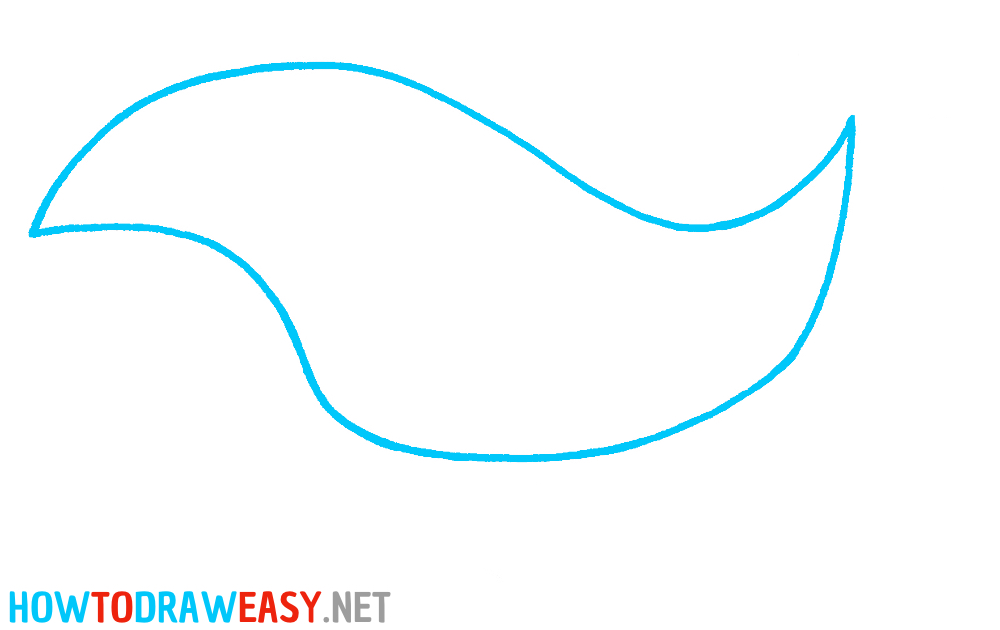
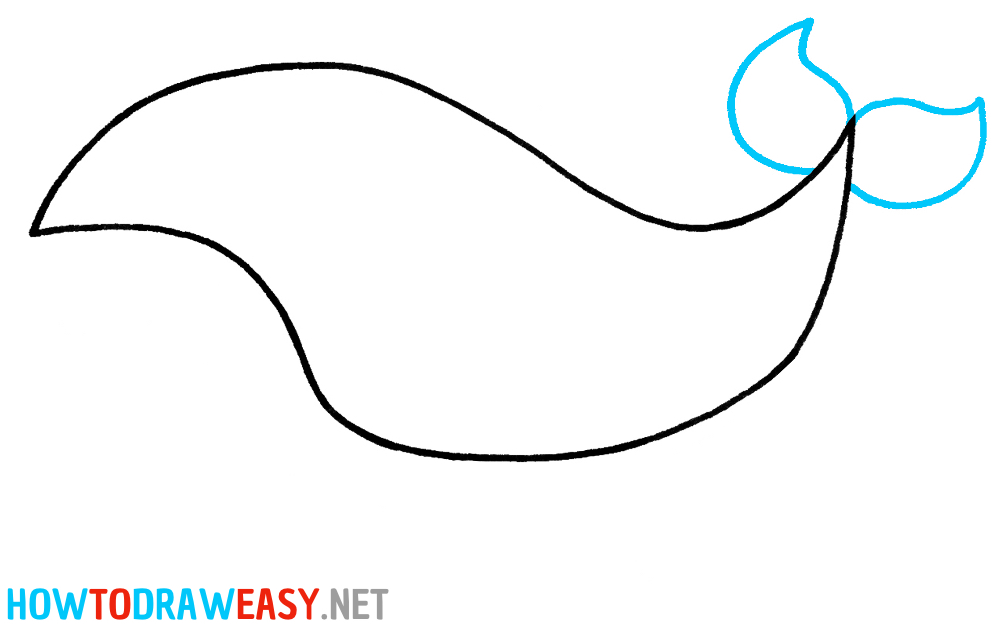
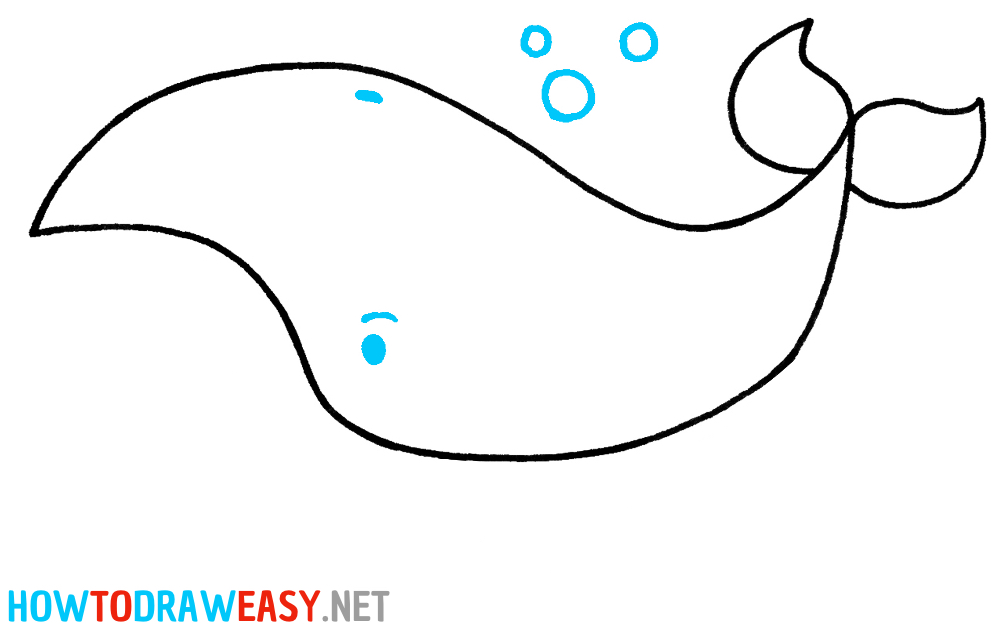
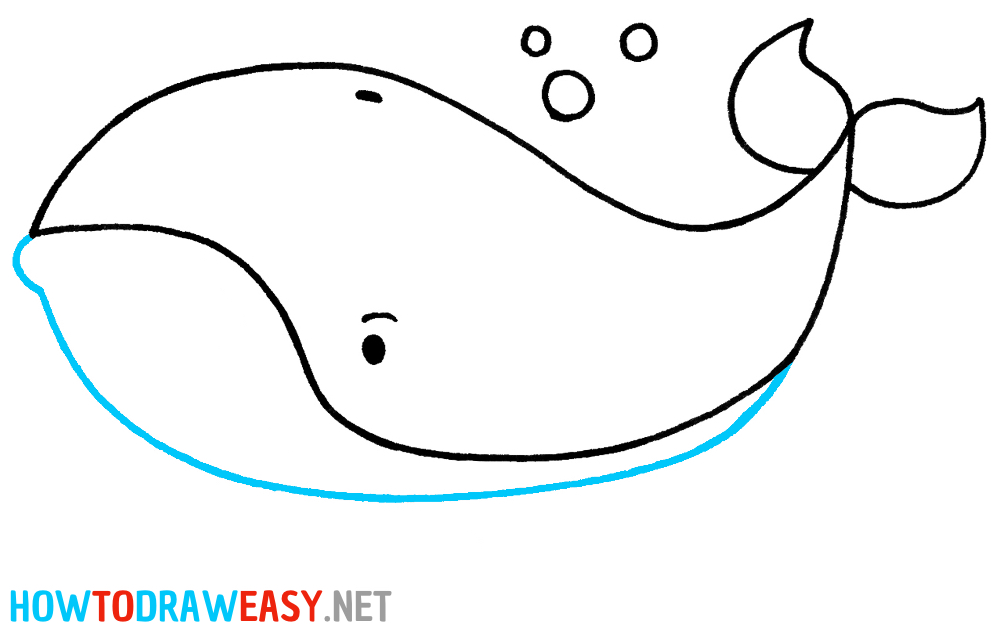
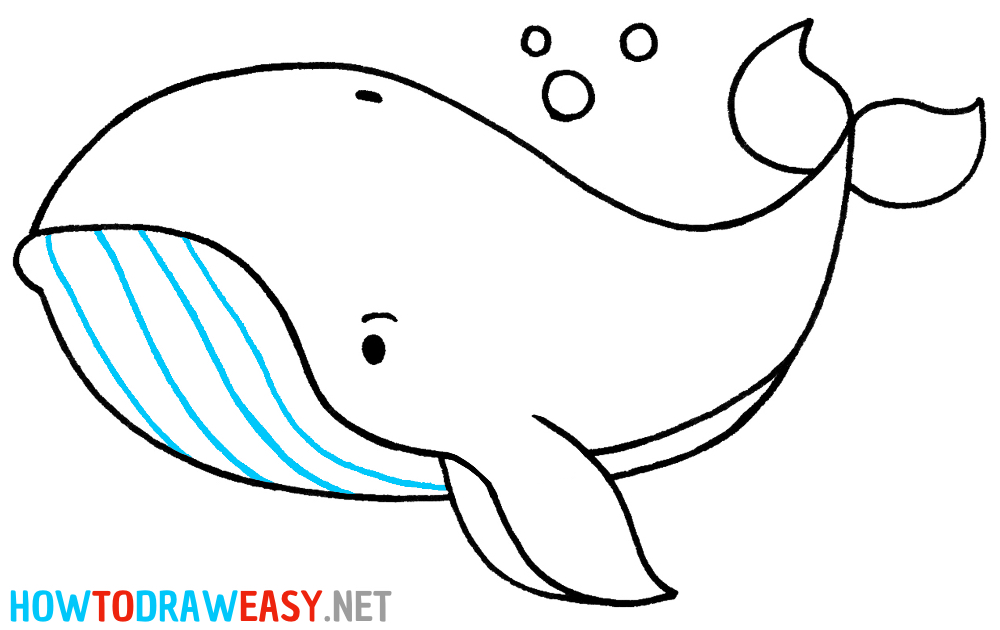
We are glad to see you in this step-by-step drawing lesson. Let’s dive into drawing together, where you will learn how to draw a whale easy step by step!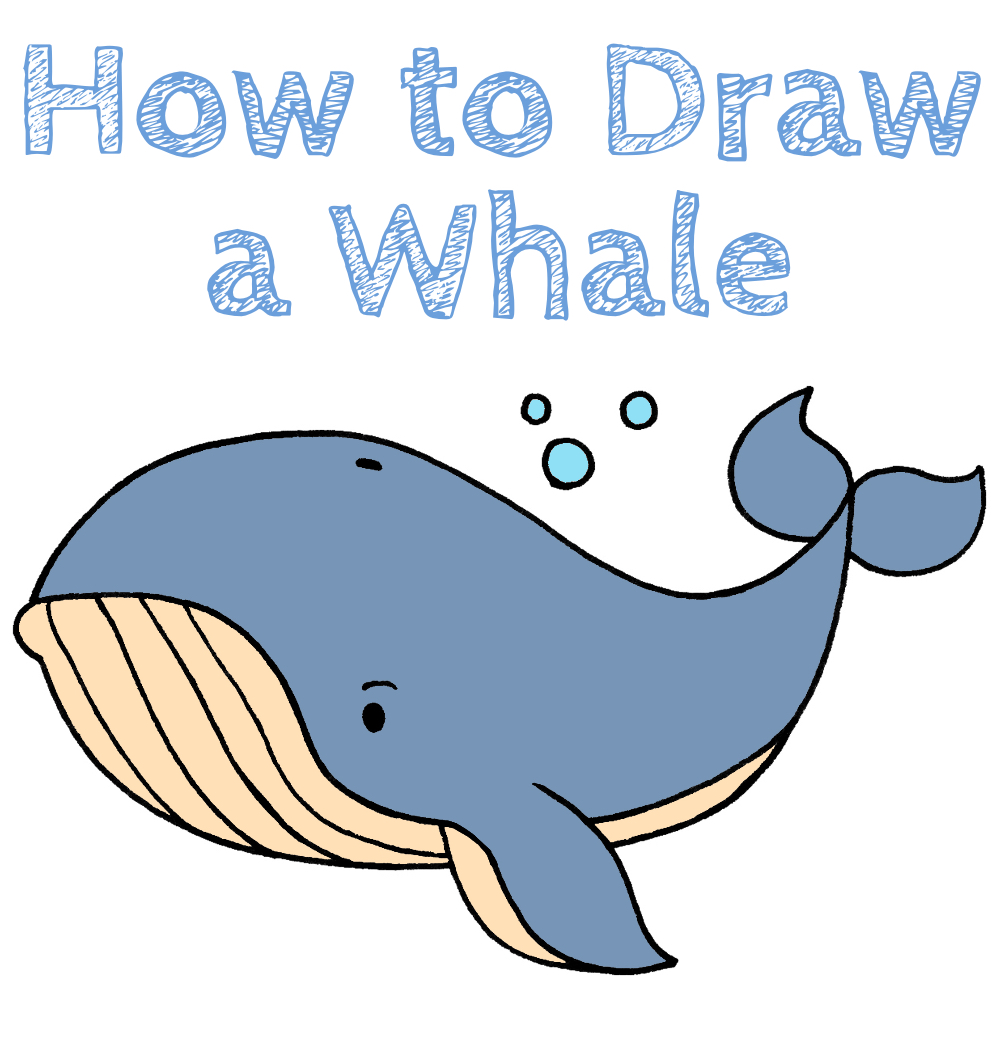
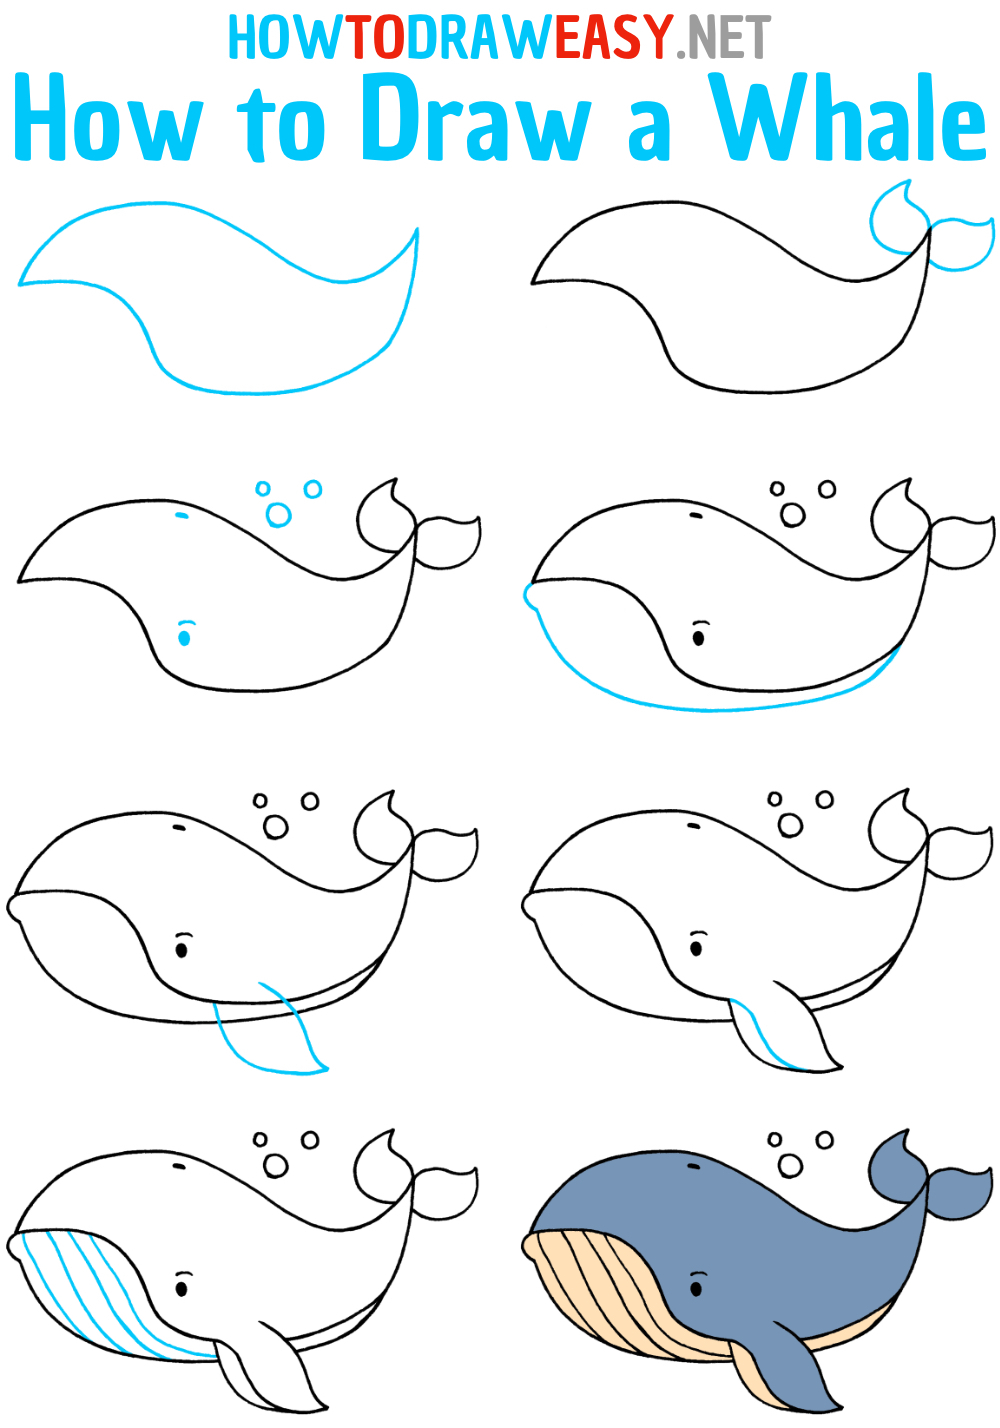
Welcome to a drawing lesson dedicated to one of the most majestic creatures of the ocean — the whale! In this step-by-step and easy drawing tutorial, you will learn how to draw a whale. We will immerse ourselves in the world of ocean depths and try to capture on paper all the beauty and power of this amazing marine creature. Get your brushes and paints ready, as together we will embark on an exciting journey through the vast seas, where every drop of water and every movement of the whale’s tail will inspire our creative ideas. Get ready for an unforgettable experience of drawing a whale that will leave a mark in your heart and on your sheet of paper! Time needed: 30 minutes How to Draw a Whale Step by Step
Congratulations on completing the drawing of the whale! Now you have a beautiful whale drawing. I hope this tutorial was interesting and inspiring for you. Remember, practice makes perfect, so don’t stop here and keep drawing. Every artist has their own style and path, so experiment, create, and enjoy the creative process. We will be happy to help you with new lessons and advice. Good luck on your creative journey! You can also try to draw an easier version of a whale or another sea creature — a shark. Have a great mood! The post How to Draw a Whale appeared first on How to Draw Easy. In this step by step drawing lesson, you will learn how to draw a plane step by step! This easy lesson is perfect even for beginners.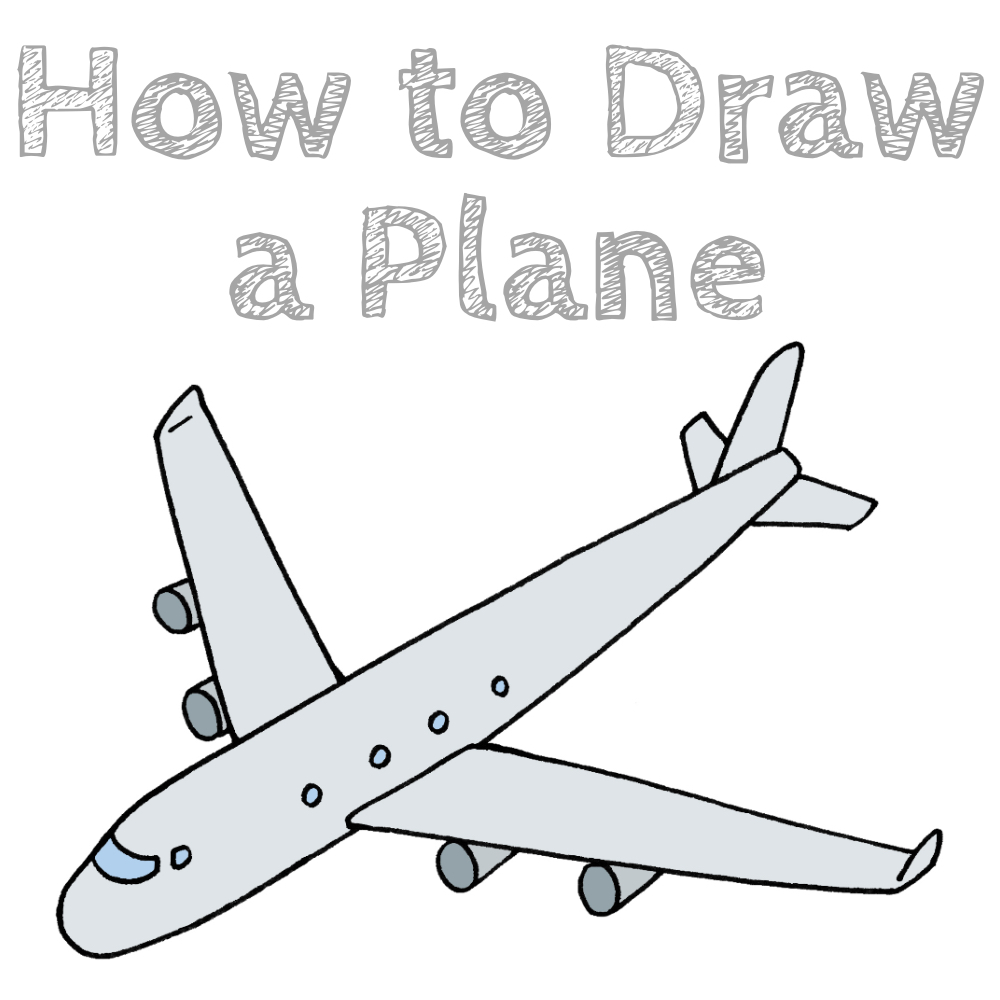

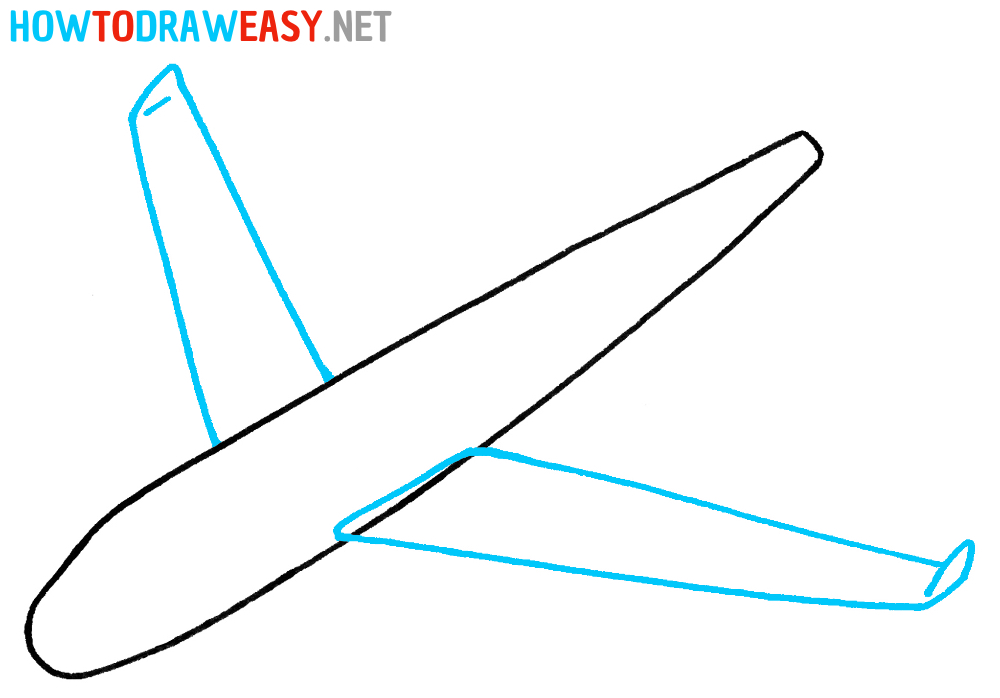
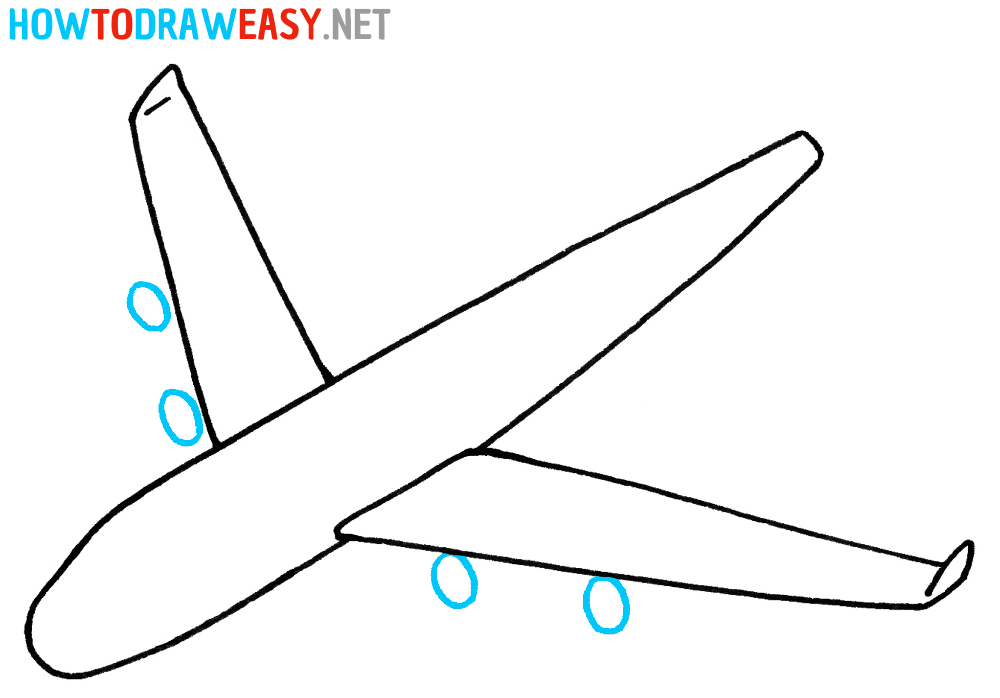
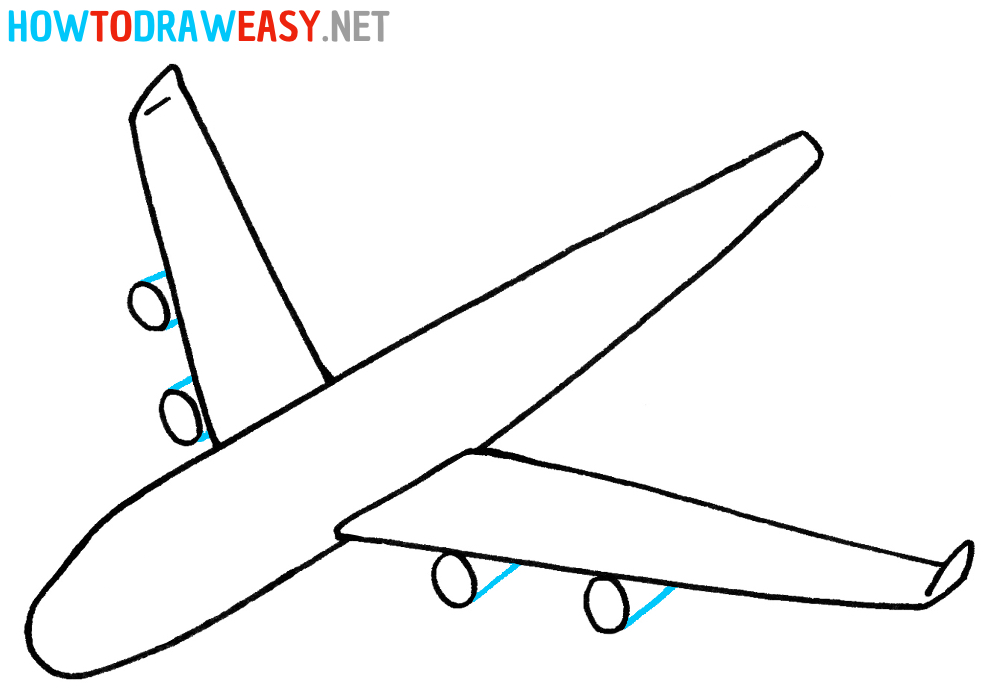
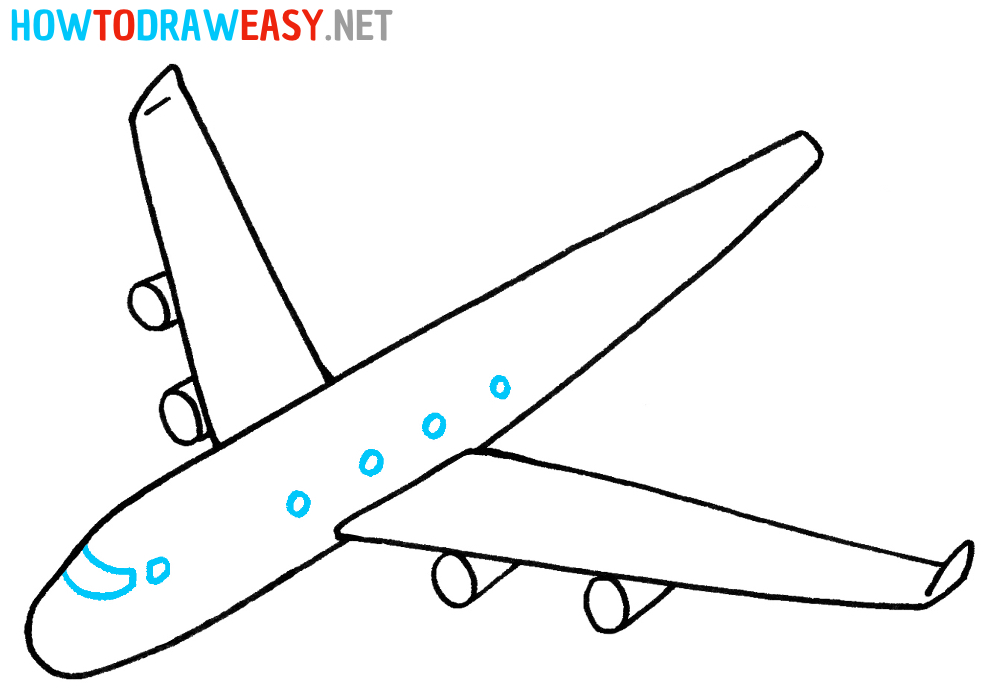
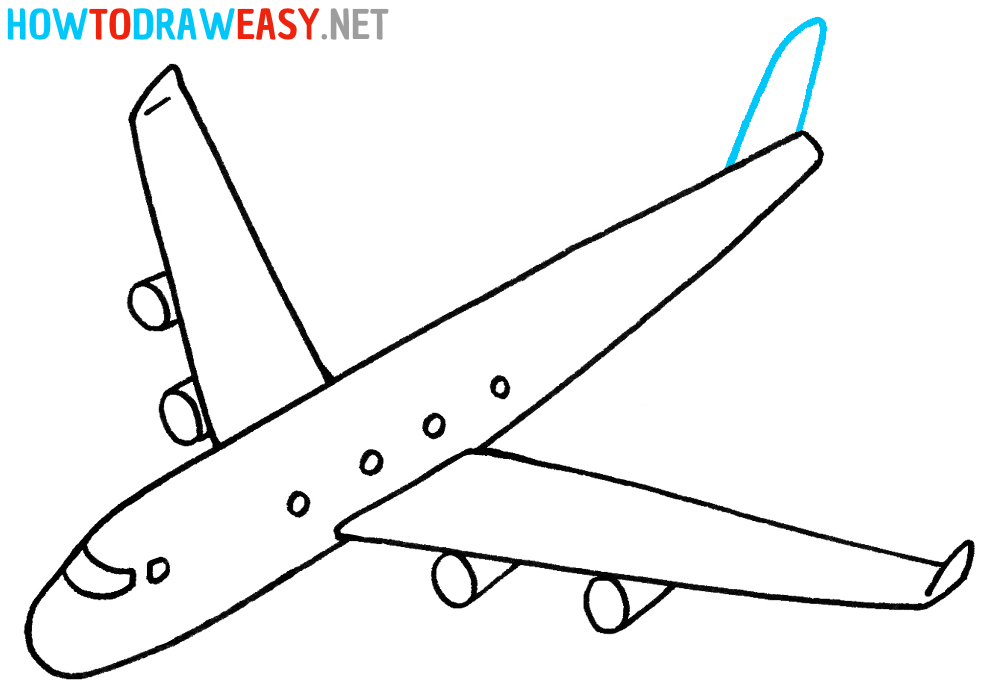
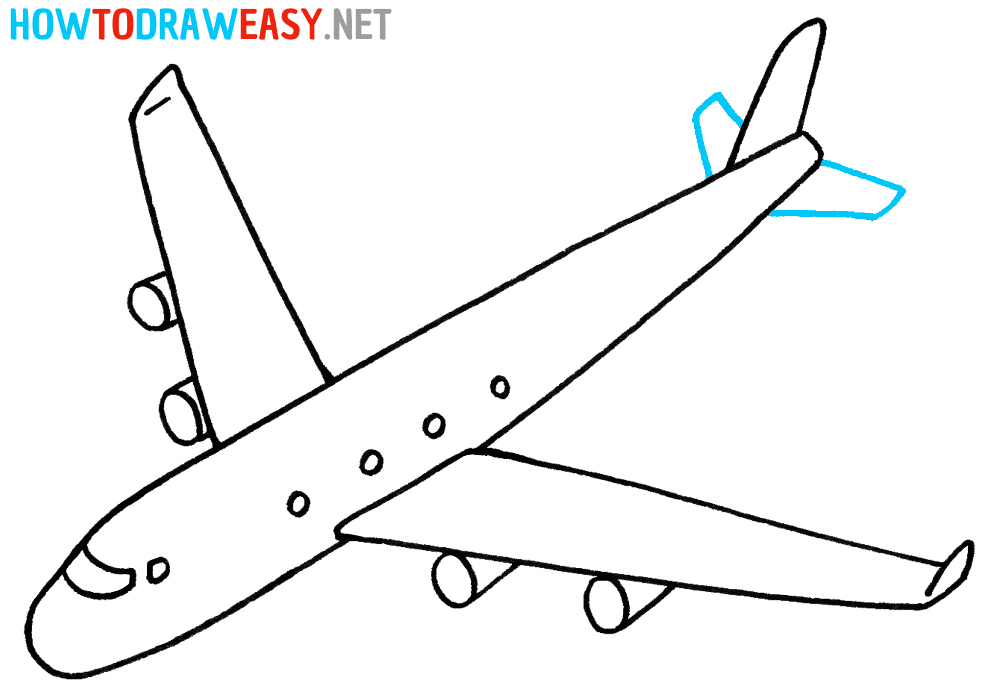
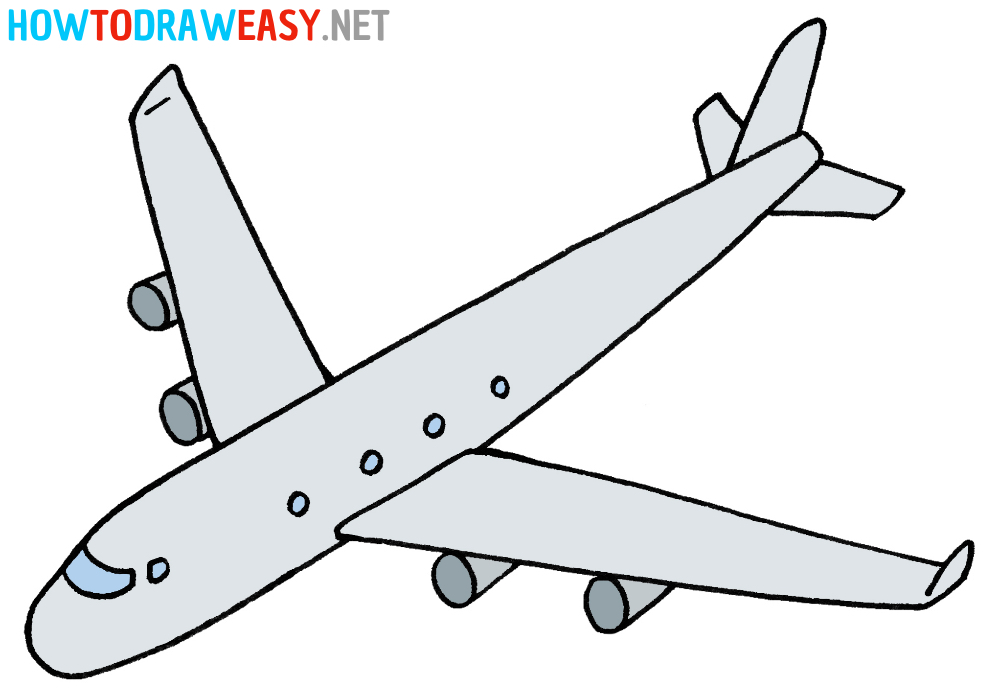
Welcome to the Airplane Drawing Lesson! In this lesson, we will explore the basic principles and techniques of drawing airplanes so you can create your own unique airplane drawing. For a long time, airplanes have been a symbol of progress and a grand technological project. In this lesson, we will dive into the world of aviation and learn how to convey this energy and dynamism on paper. Learn how to draw a plane step by step with us! Together, we will learn to create realistic and creative airplane drawings that are captivating and inspiring. If you already have experience in drawing, you can use your skills to achieve more complex results. If you’re a beginner, don’t worry, we’ll start with the basics and gradually take you to a new level of expertise. Acquire knowledge about airplanes, learn the principles of drawing, and develop your creative style. By the end of the lesson, you will be able to tell your own airplane story using your new skills and achieving amazing results. Feel free to ask questions and suggestions, and be prepared for this journey! Time needed: 25 minutes How to Draw a Plane Step by Step
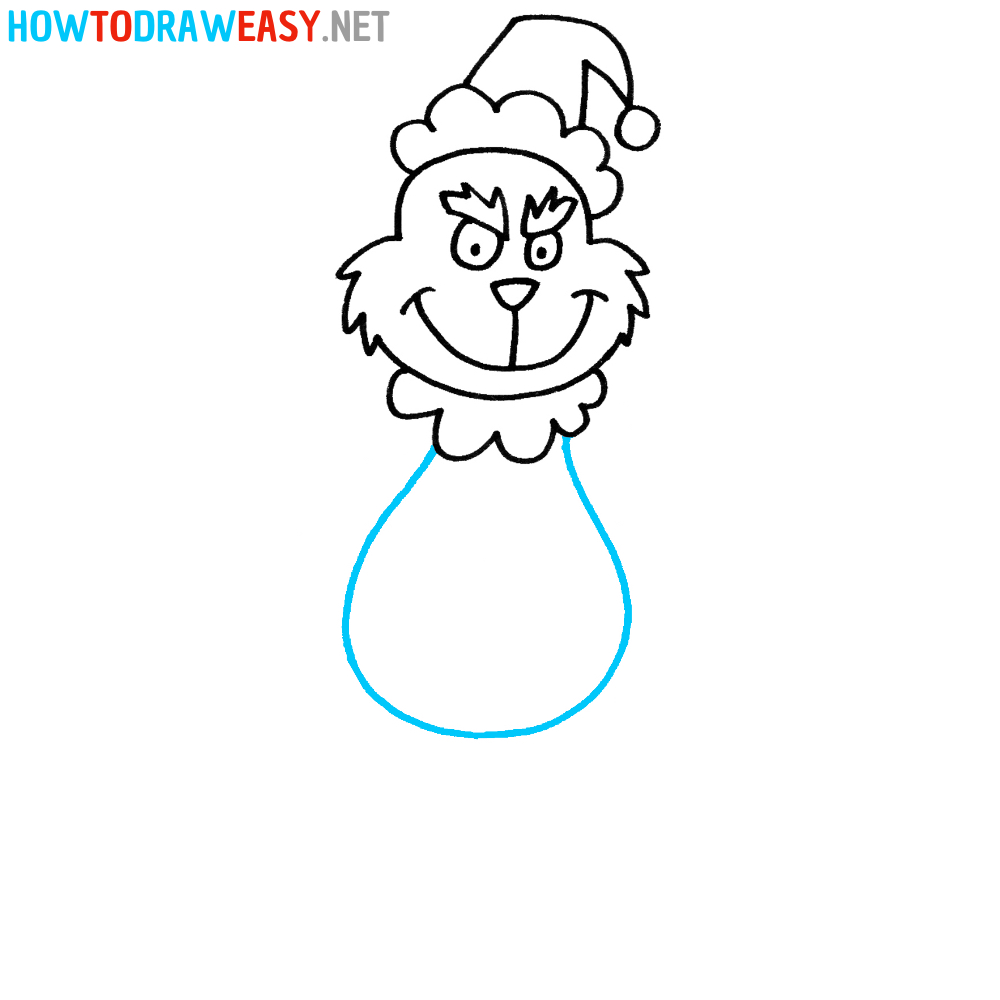
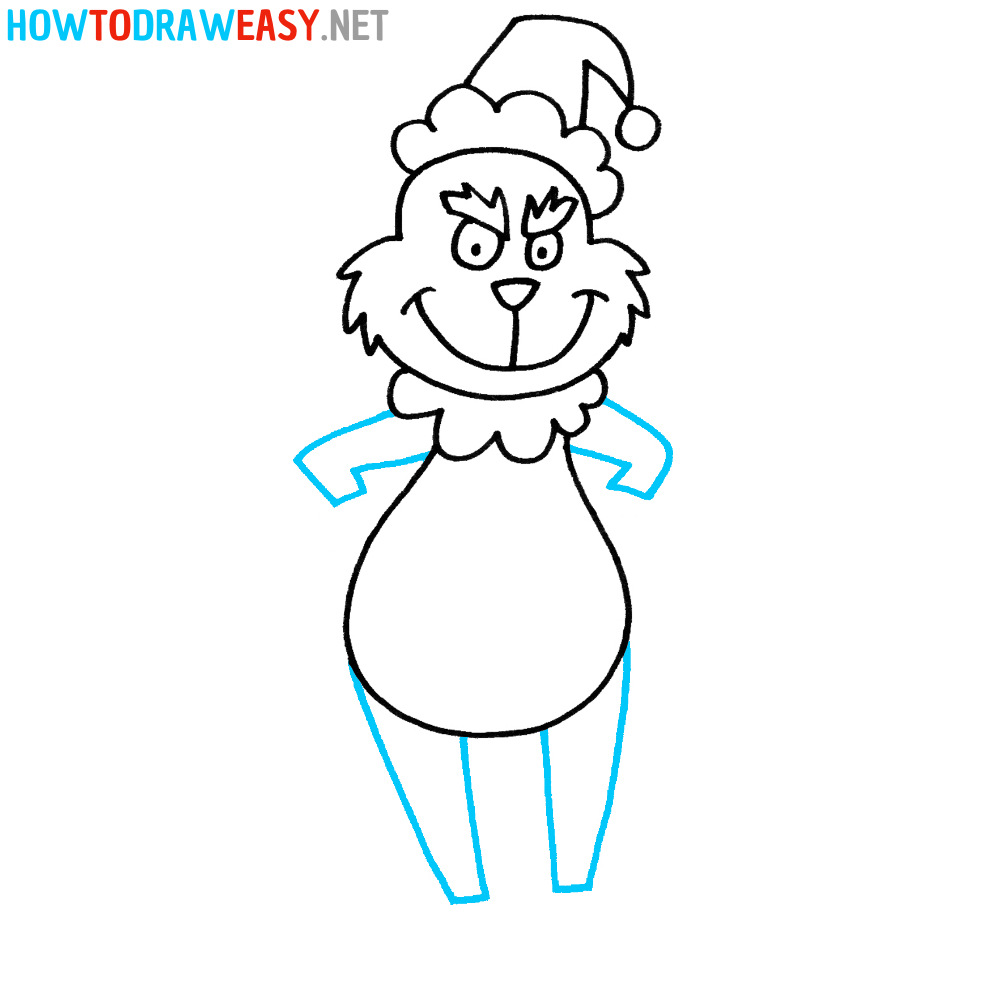
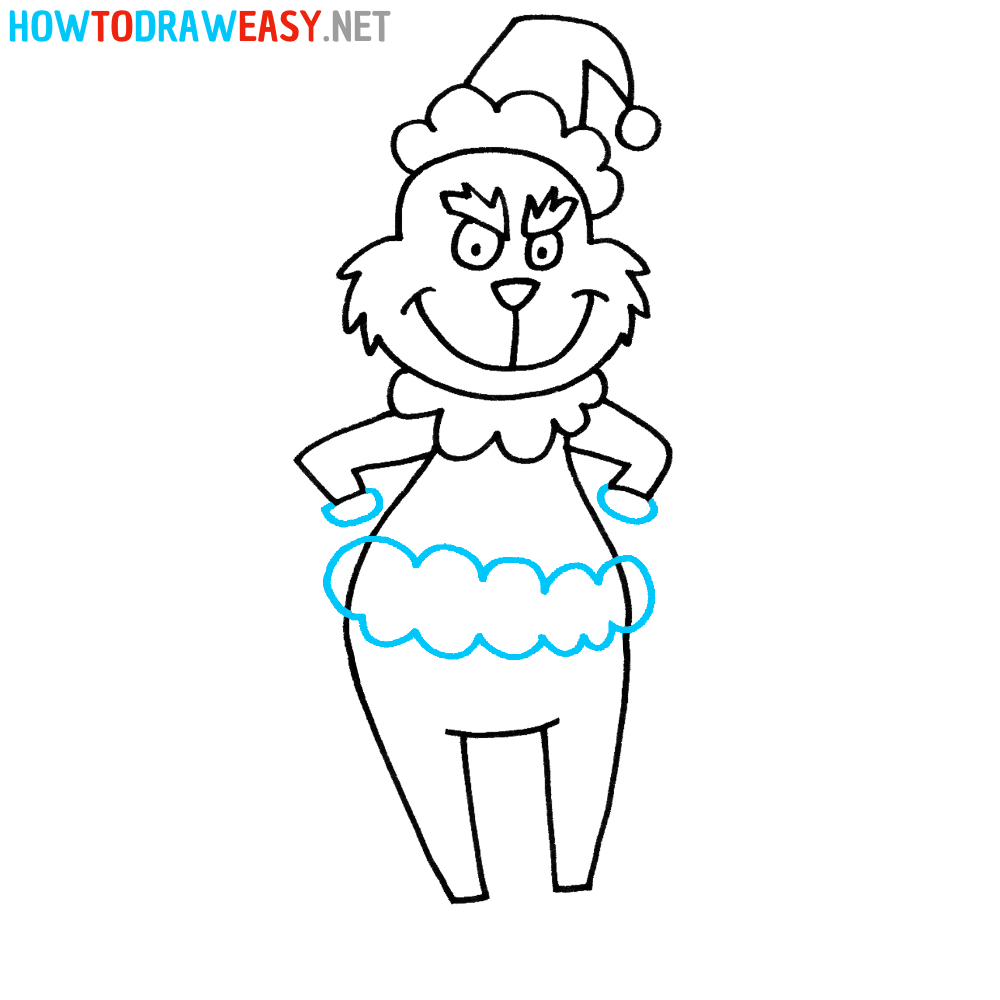
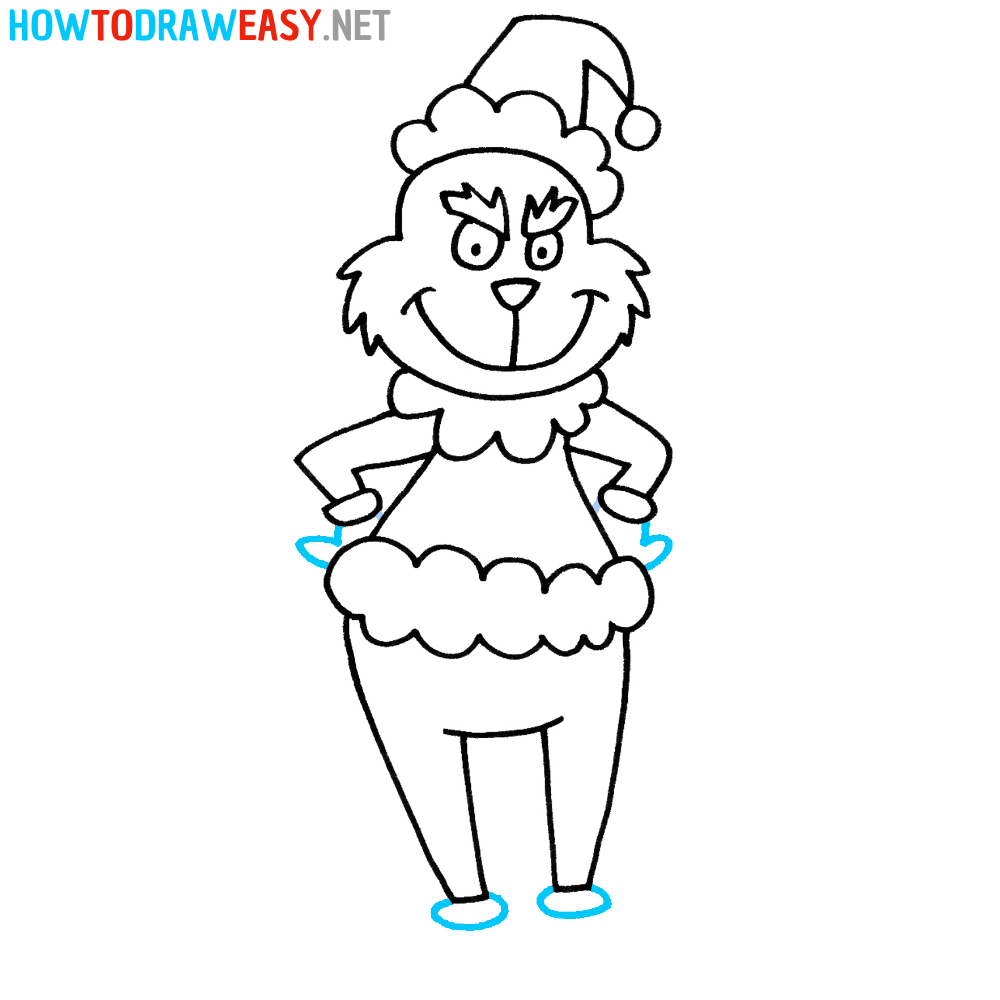
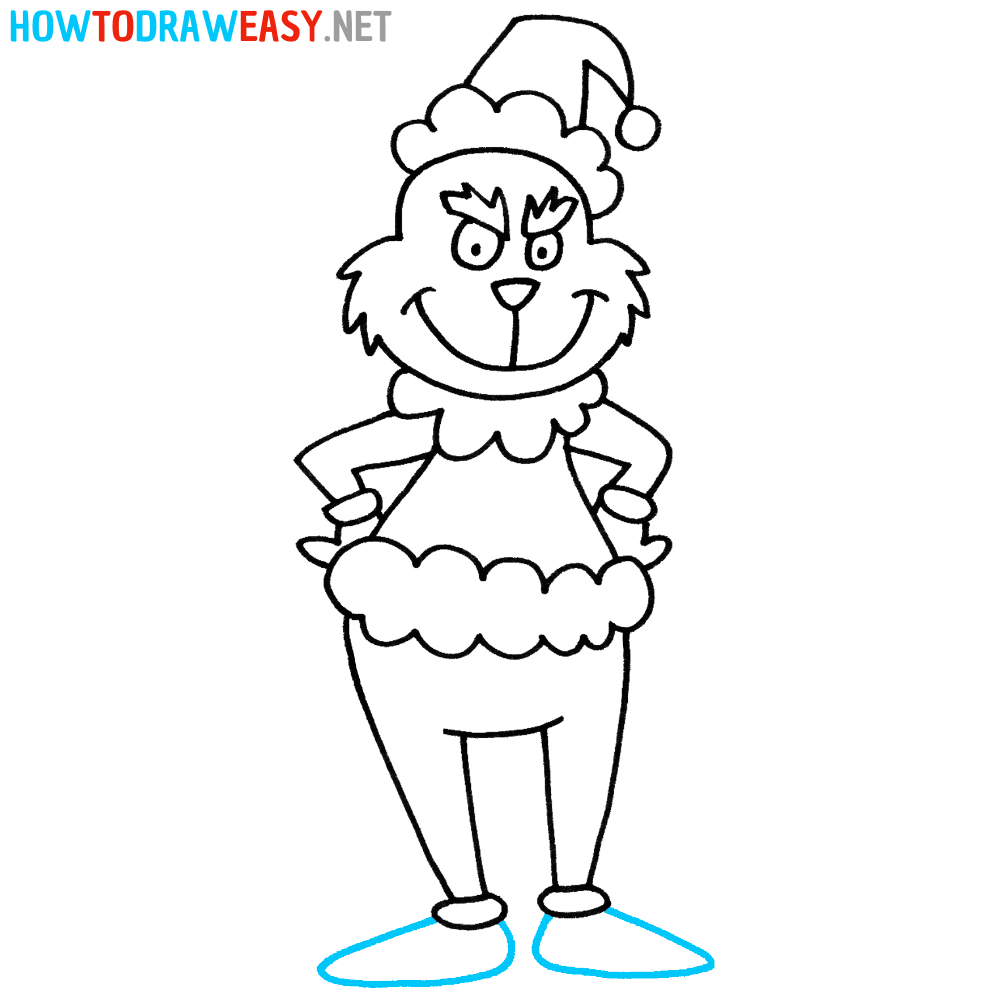
Here is our airplane drawing ready! We have successfully created all the main elements: fuselage, wings, engines, windows, cockpit, and tail section. Now our airplane looks fully completed and ready for flight! Don’t forget that each of you can add your own creative approach to drawing an airplane. You can change the sizes, shapes, and even colors to create a unique design for your own aircraft. Remember, practice makes perfect, so don’t stop at what you have achieved! Keep drawing and experimenting with different styles and techniques to improve your skills and develop your creative vision. Thank you for participating in this airplane drawing lesson! I hope you enjoyed the process and are pleased with the result. Good luck on your creative journey, and until we meet again! The post How to Draw a Plane appeared first on How to Draw Easy. This visual collage illustrates each sequential step leading to the final artwork. Follow the instructions, and you will learn how to draw the Grinch!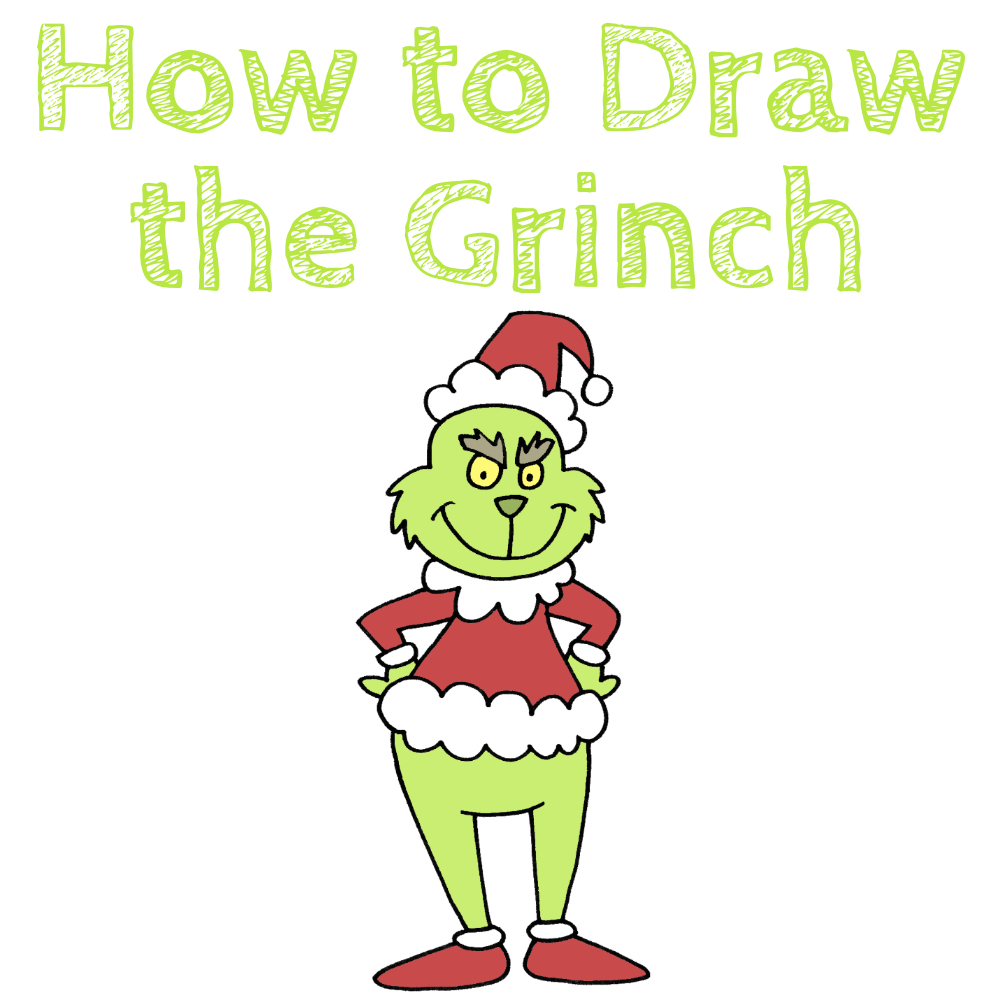
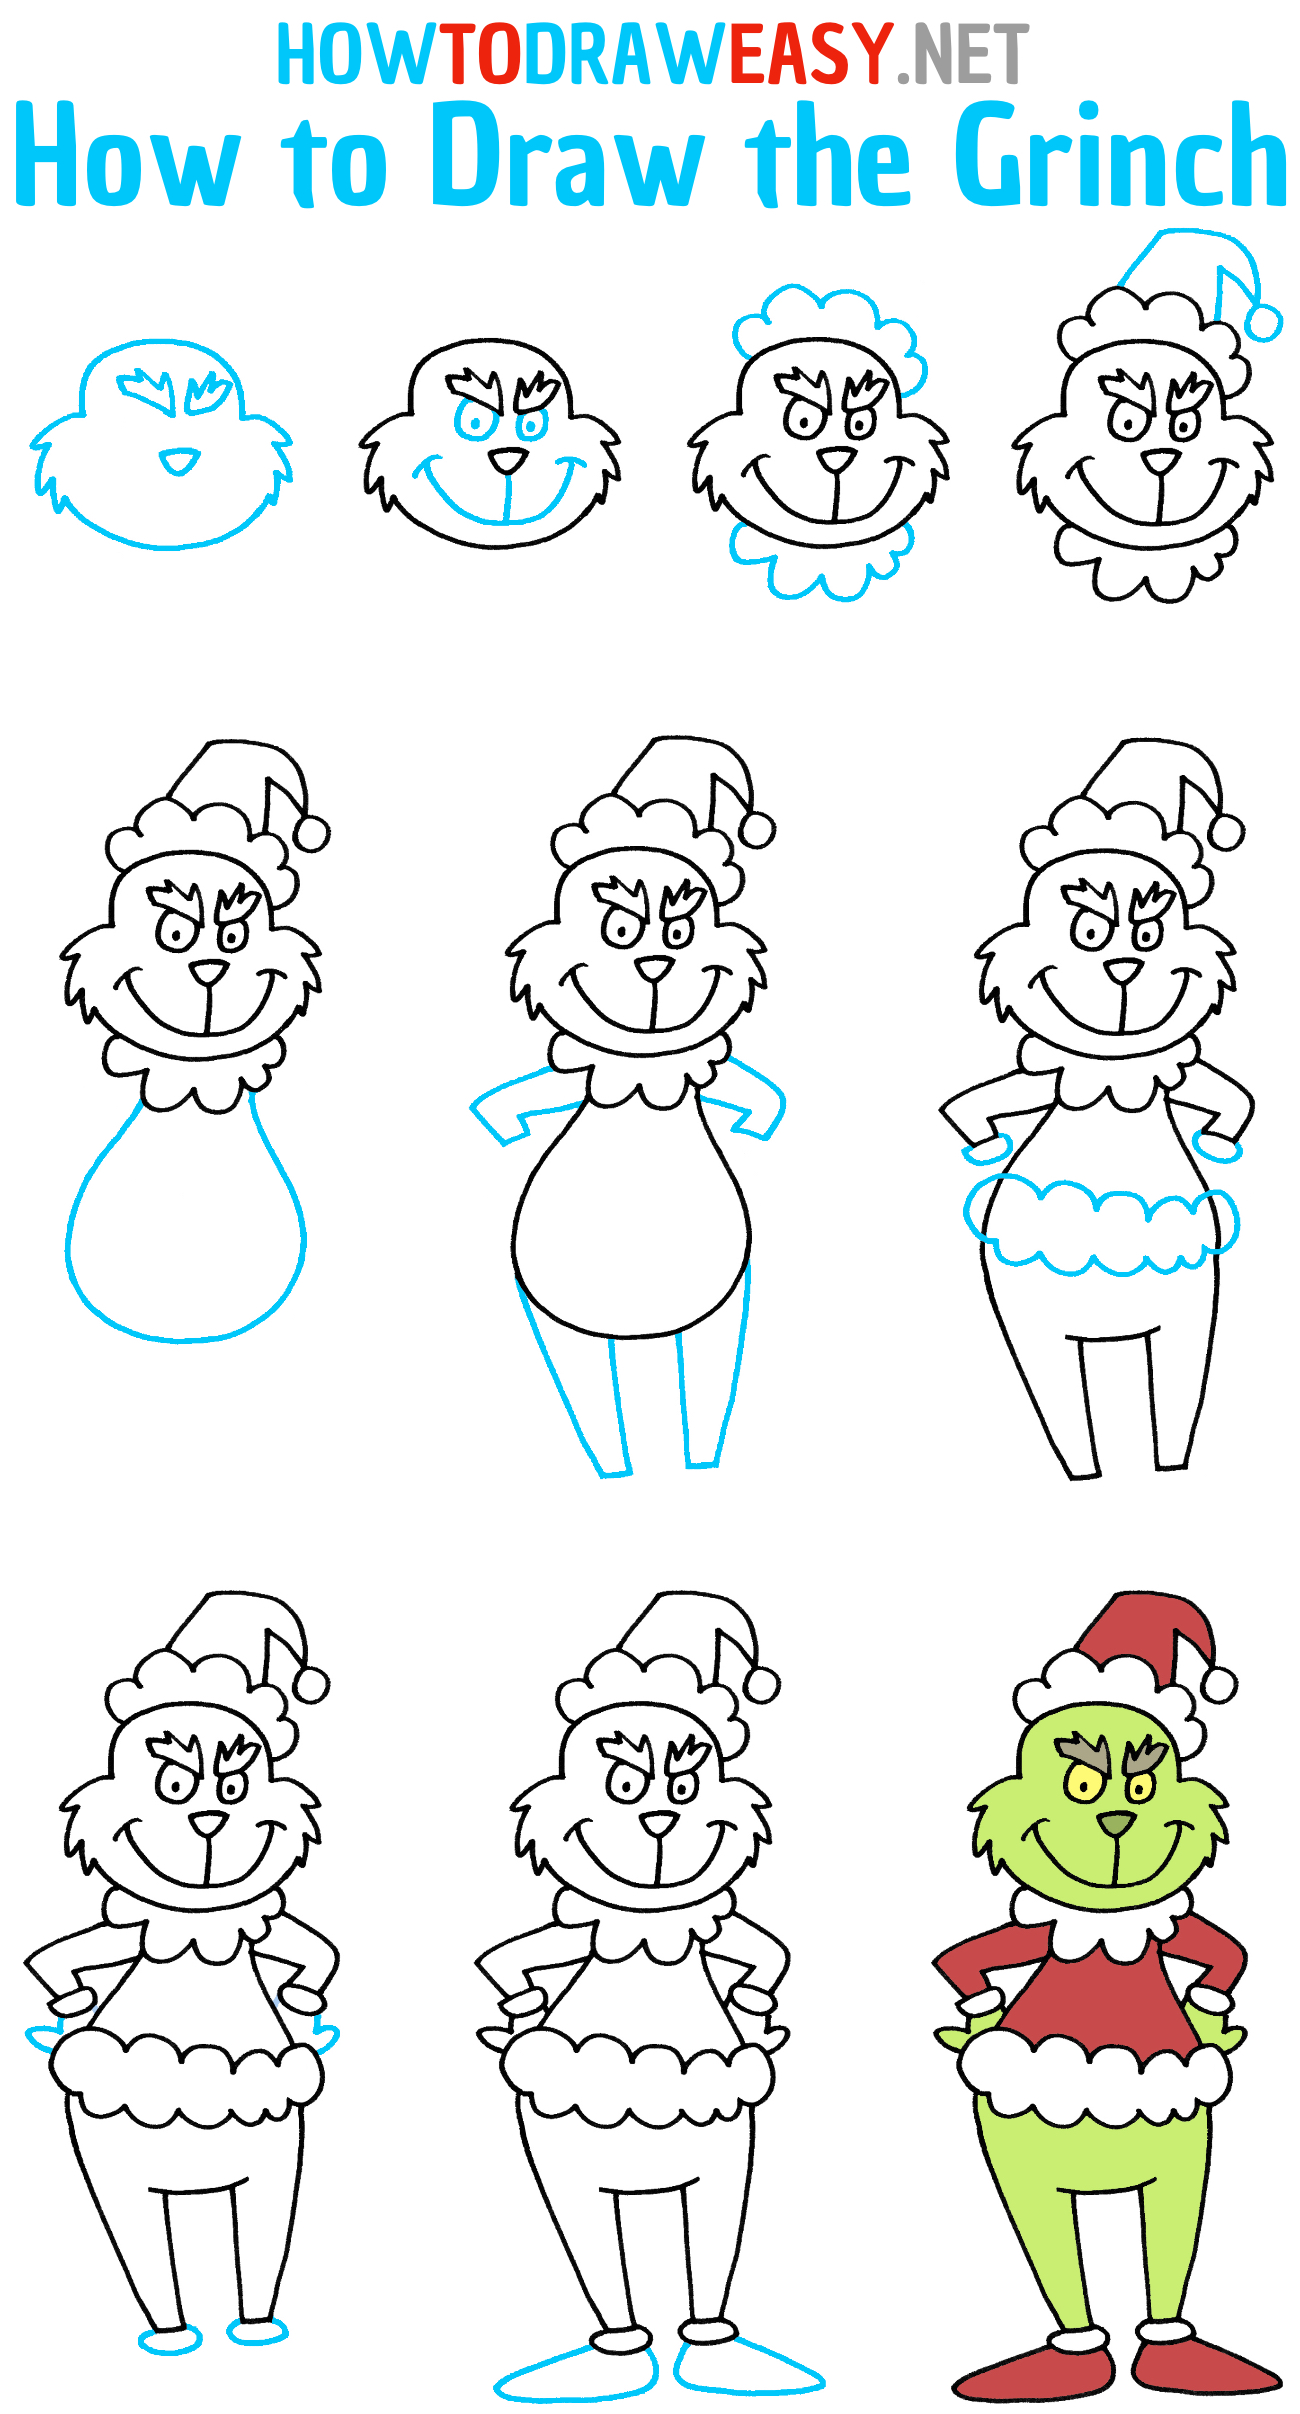
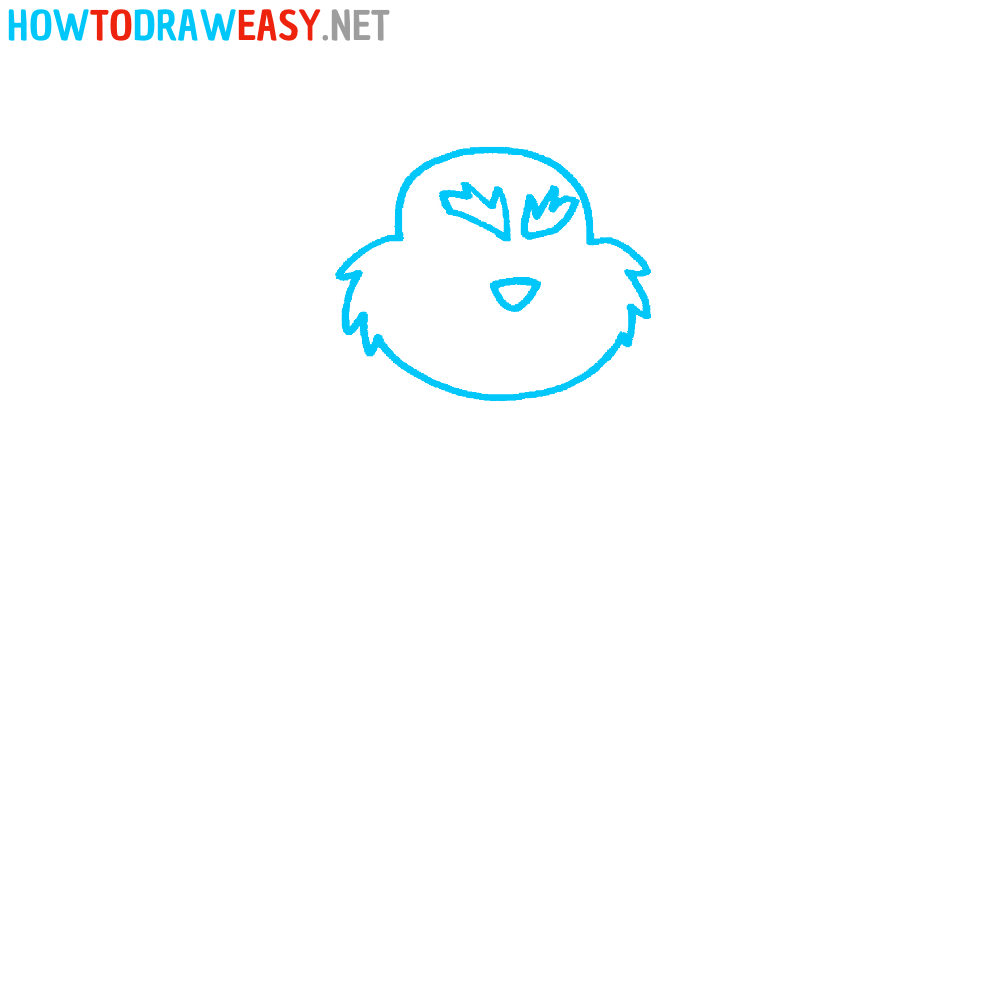
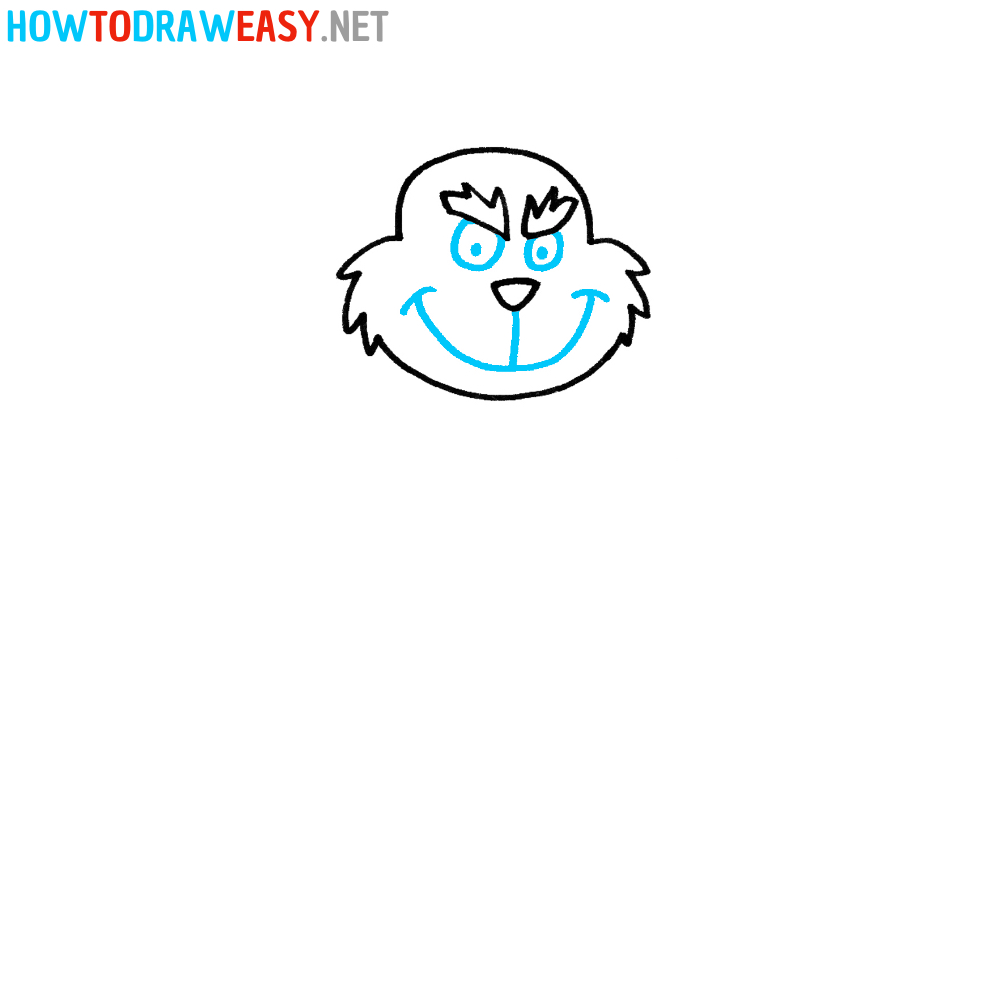
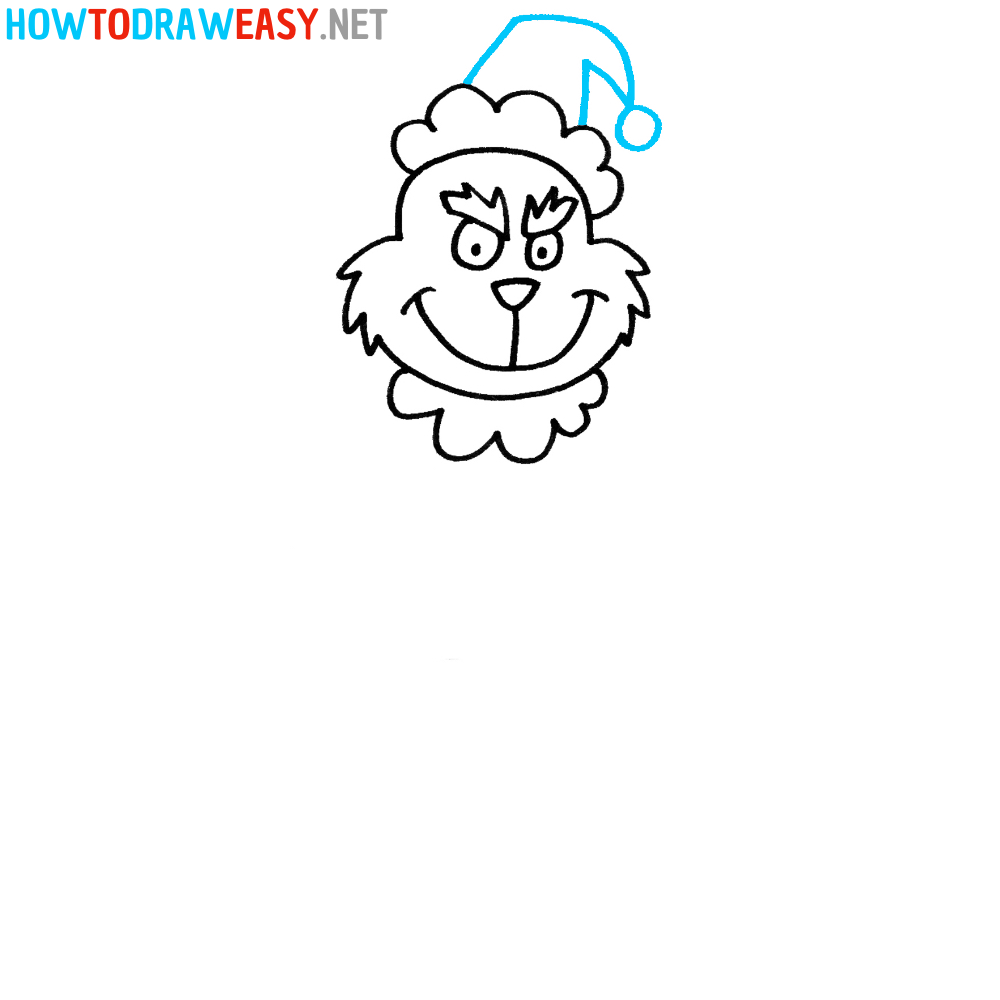
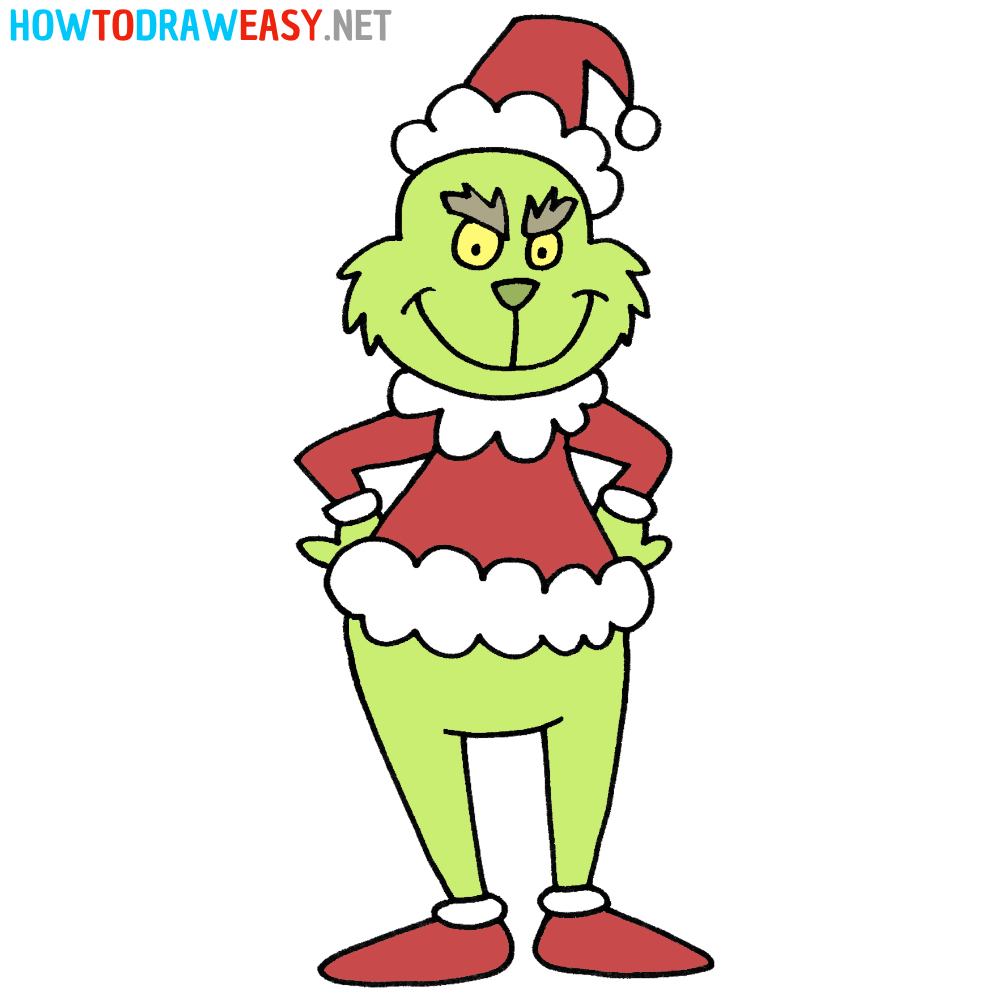
Welcome to the Grinch drawing lesson! Today we will be learning the technique of drawing this famous character from the Dr. Seuss book How the Grinch Stole Christmas! The Grinch is a green, angry and unpleasant creature who hates the Christmas holiday. Step by step, you will learn how to draw the Grinch! The Grinch lives in a cave on Mount Crumpit, far away from the town of Whoville. He dislikes Christmas and considers it only an excuse for consumption and insane spending. Therefore, the Grinch decides to steal Christmas to show the people of Whoville how hopeless and meaningless it is. However, thanks to the efforts of a little girl named Cindy-Lou Who, the Grinch realizes that Christmas is not just a holiday, but a time for love, kindness, and family values. In the end, the Grinch becomes a true friend to the people of Whoville and opens his heart to Christmas. Despite the Grinch’s angry appearance, his character is one of the most popular Christmas characters in the world. In this lesson, we will learn how to draw the Grinch from scratch using simple steps and instructions. This lesson is suitable for all ages and skill levels, so let’s get started! Time needed: 30 minutes How to Draw the Grinch Step by Step
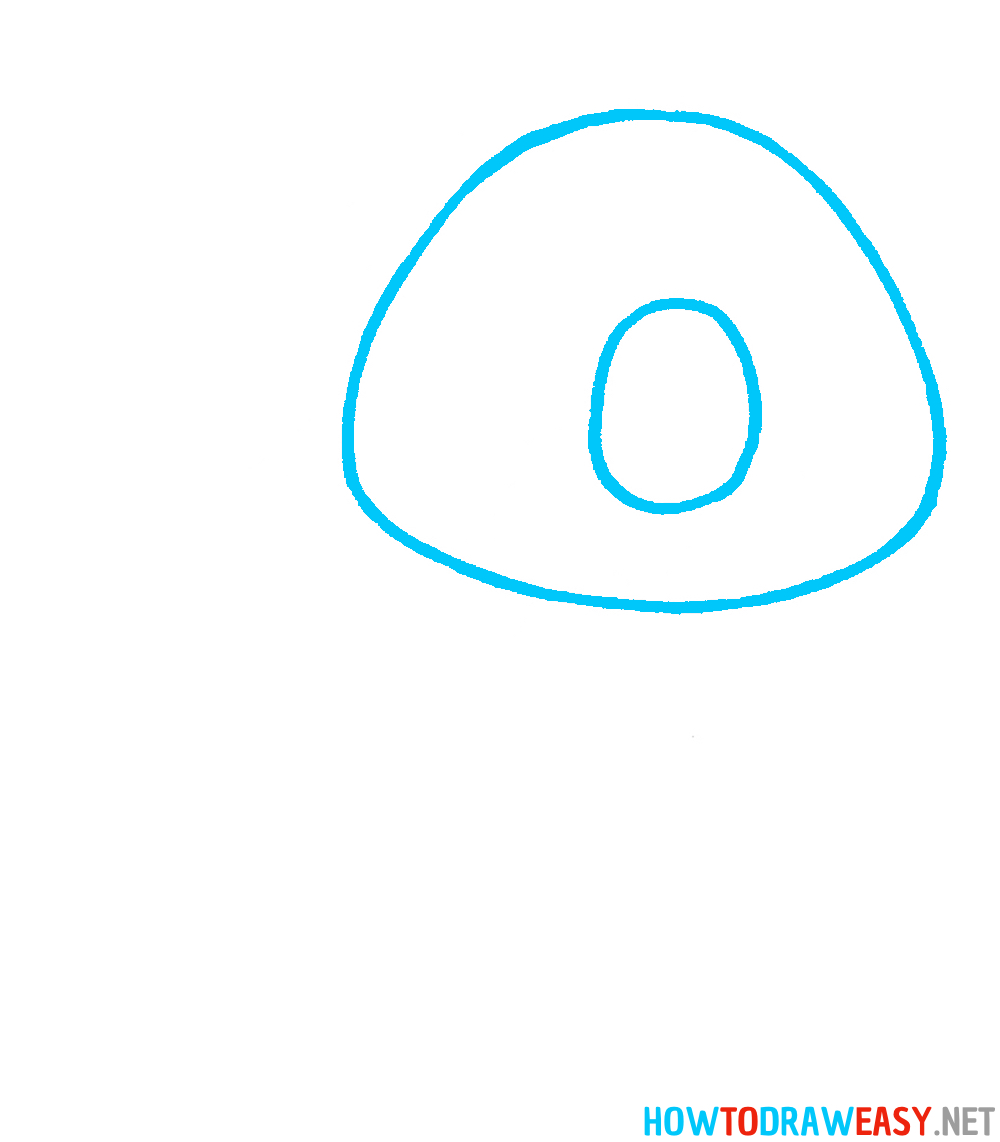
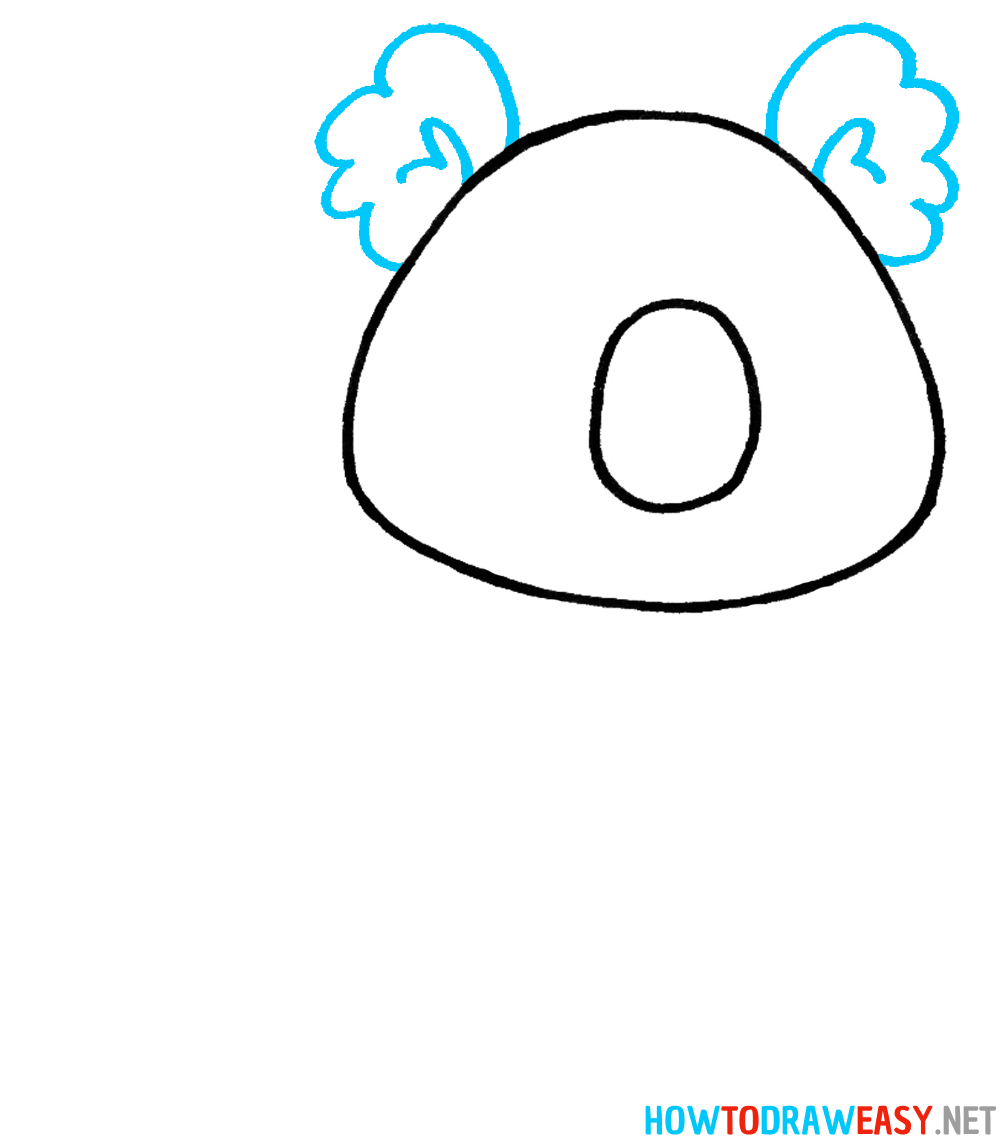
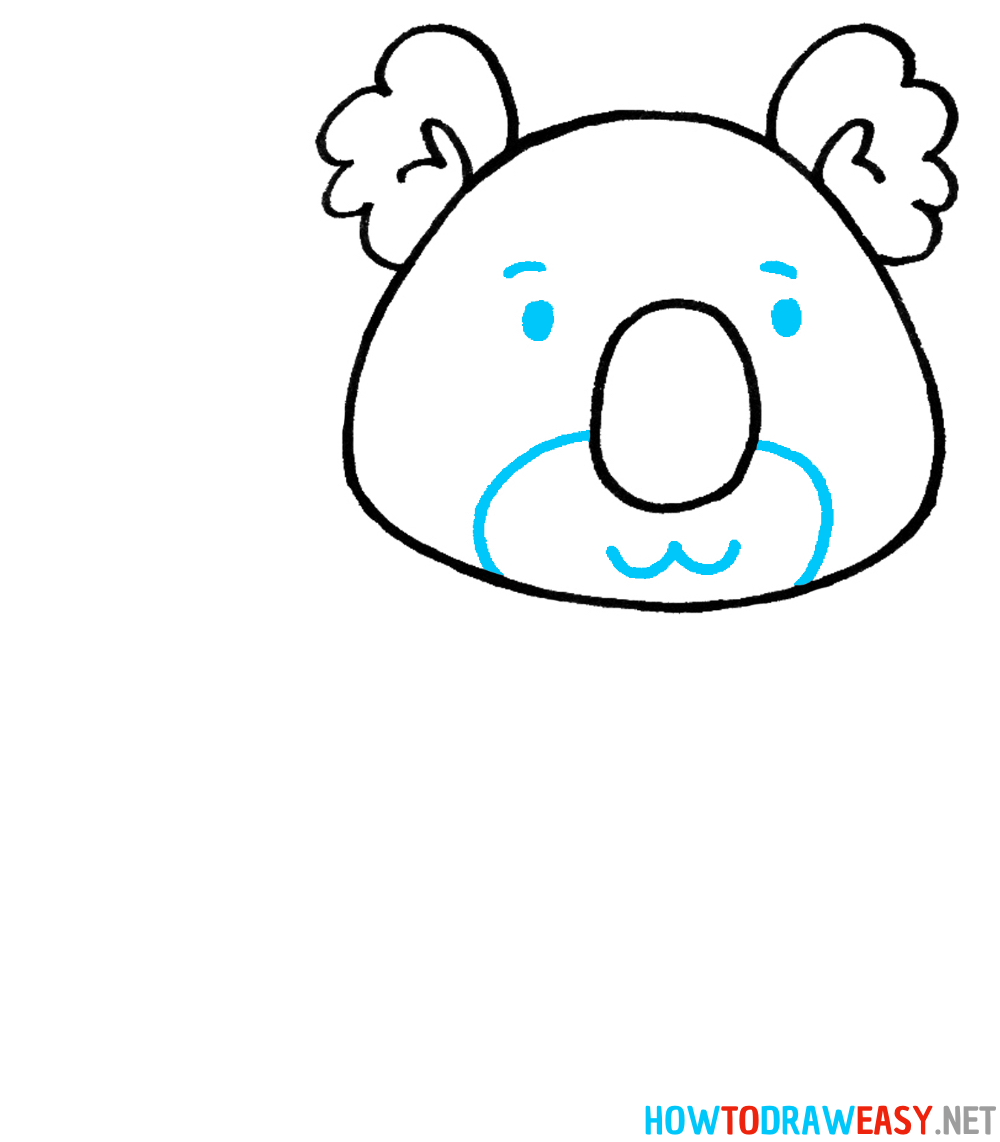
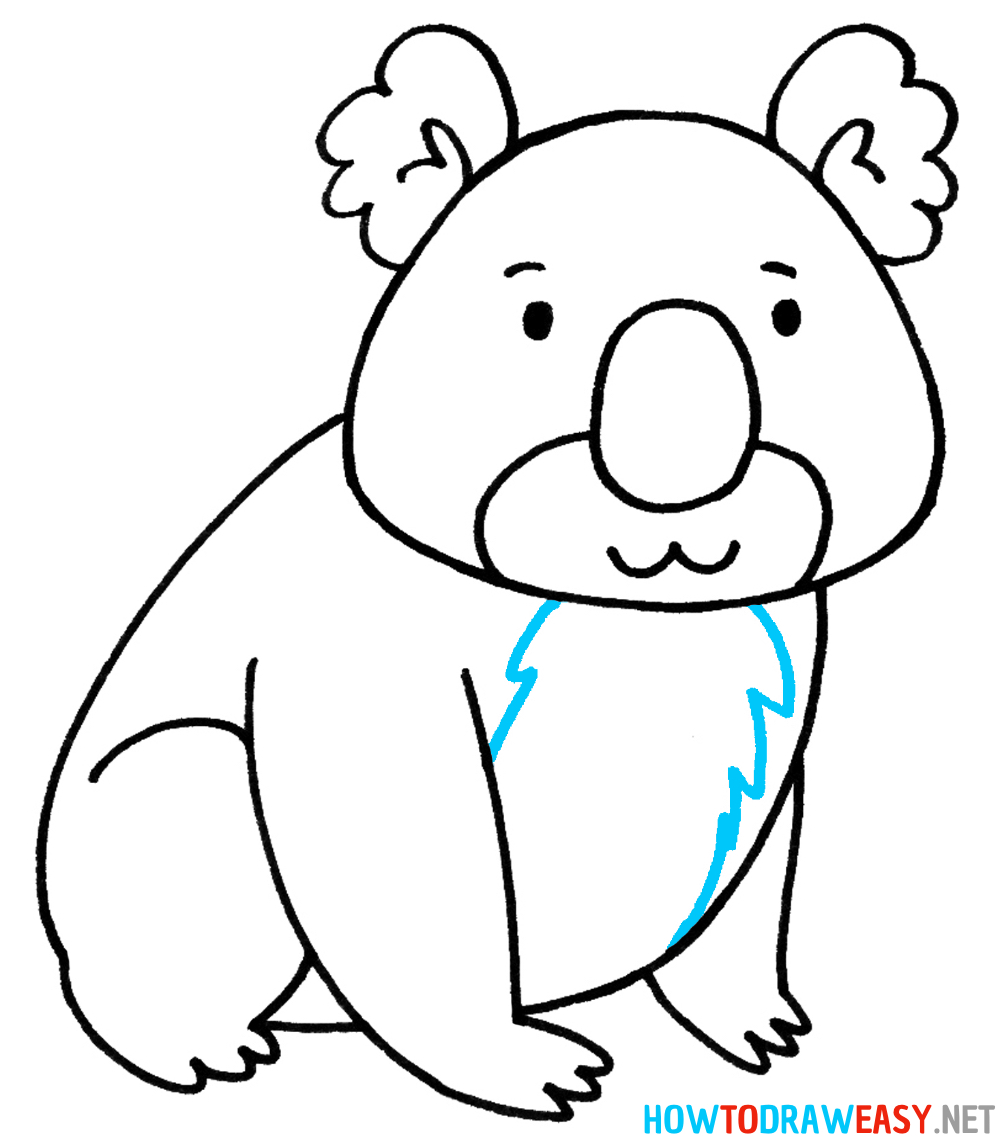
Congratulations, you have successfully learned how to draw the Grinch! This cheerful and evil character has become a favorite hero of many people due to his unique appearance and charisma. We hope this tutorial helped you improve your drawing skills and enjoy the process of creating your own Grinch. Don’t forget that practice makes master, so keep drawing and experimenting with new techniques and styles. Good luck in your creativity! The post How to Draw the Grinch appeared first on How to Draw Easy. Welcome to the cute koala drawing lesson! In this step-by-step drawing lesson, you will learn how to draw a koala easily, even if you are drawing for the first time!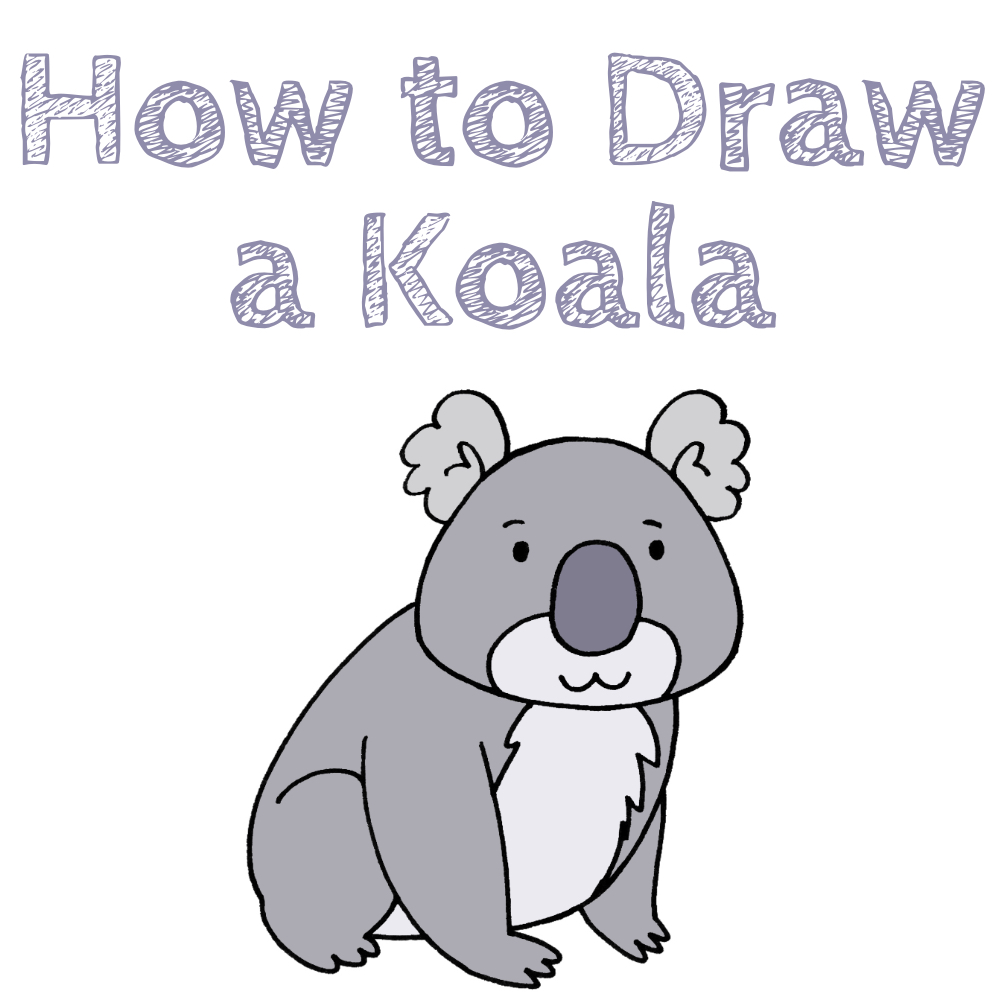

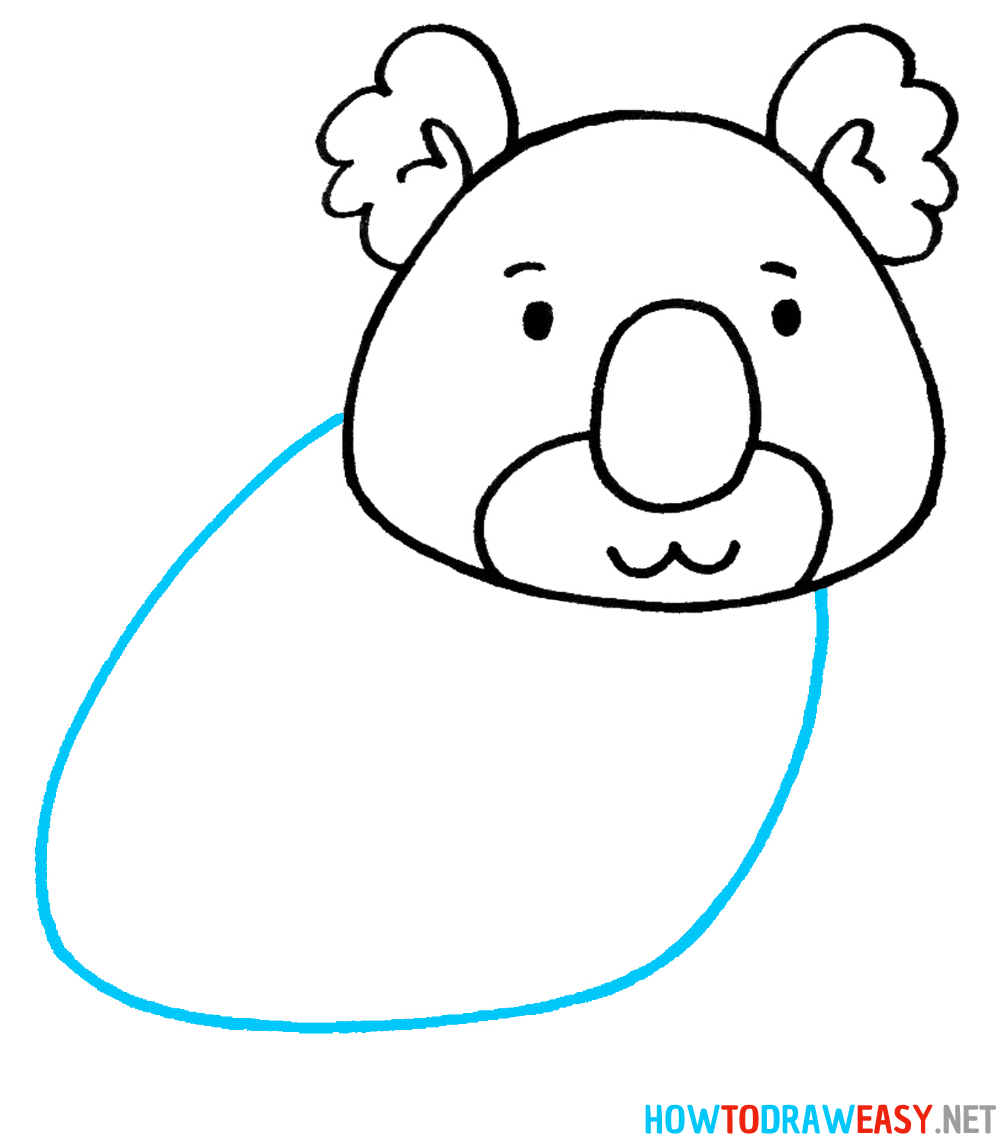
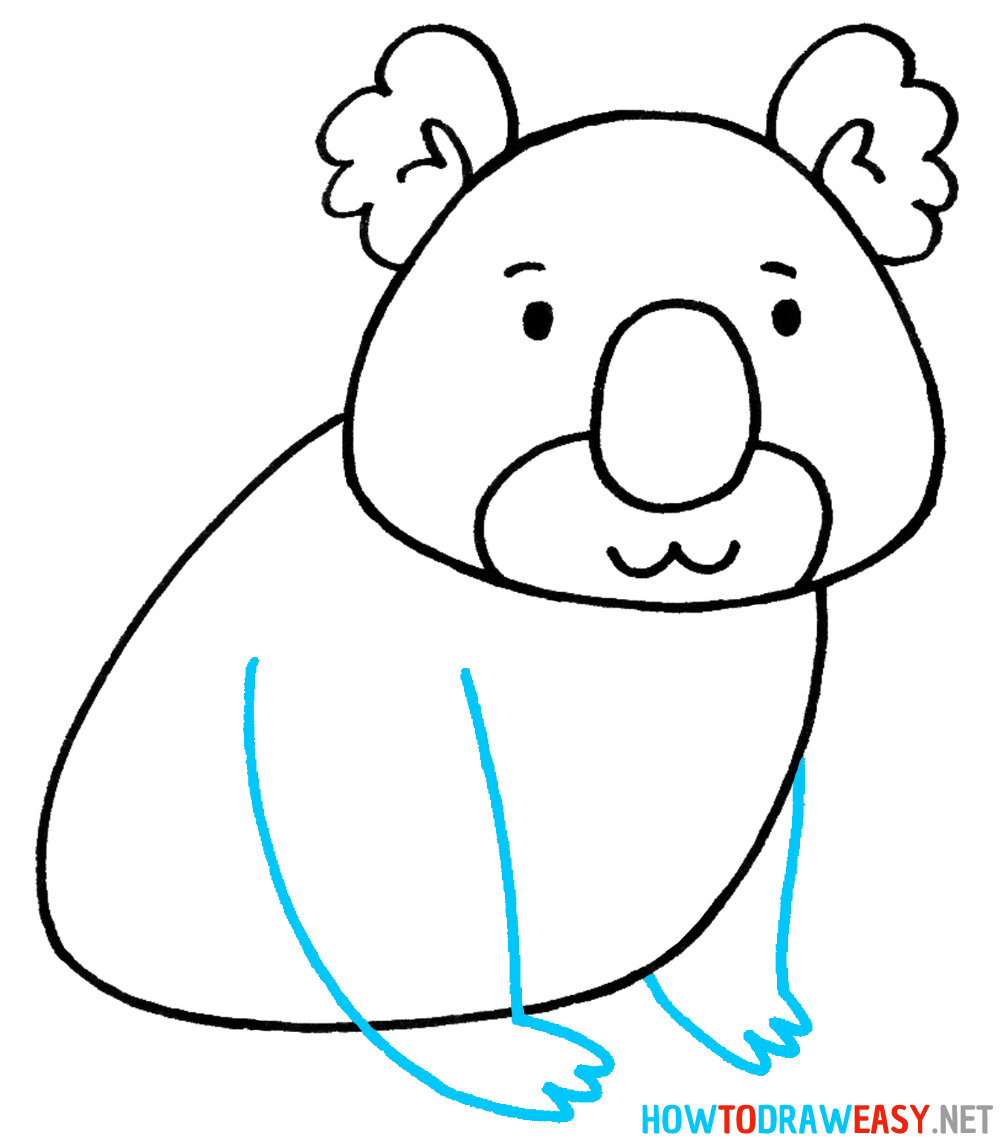
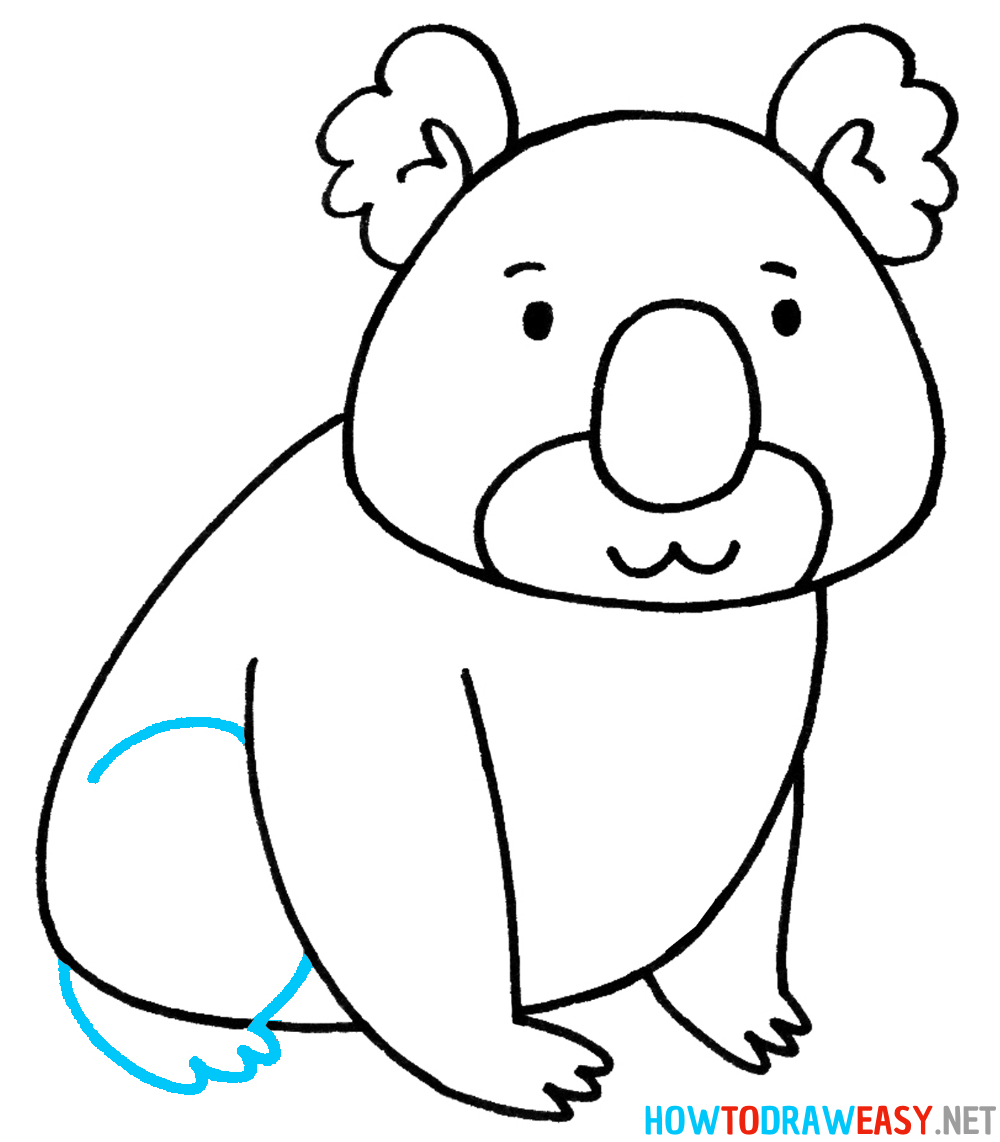
Today we will be drawing one of the cutest and most recognizable animals in Australia—the koala. Koalas inhabit forests and trees in Eastern Australia, mostly on eucalyptus branches. In this step-by-step drawing tutorial, you will learn how to draw a cute cartoon koala. This easy lesson is suitable even for beginners with little experience in drawing animals. Koalas feed on eucalyptus leaves, which contain a lot of water. Koalas drink very little water, as the leaves satisfy their need for liquid. They also have a very slow metabolism, so they sleep up to 20 hours a day. Koalas have a gray or brown color with a white chest. They have round ears and big noses that help them find food. Koalas also have strong paws with sharp claws to hold onto trees. Koalas are very cute animals that have become a symbol of Australia. I hope our lesson will help you create a beautiful picture of a koala that you can hang on the wall or give as a gift to someone. Now that you know more about these amazing creatures, let your imagination run wild and try to draw your own version of an incredibly cute creation! Don’t be afraid to experiment with different poses, facial expressions, and color combinations. Share your creations with friends and family, and maybe your art will bring them as much joy as it does to you. Always remember: drawing is a wonderful way to express yourself and share your inner world with others! Time needed: 25 minutes How to Draw a Koala Step by Step
We learned how to draw a very cute and adorable koala. This lesson helped us develop our drawing skills and use basic shapes to create more complex images. We hope you enjoyed this lesson and can now draw your own beautiful koala! The post How to Draw a Koala appeared first on How to Draw Easy. In this easy drawing lesson, you will learn how to draw a cupcake easily, even for beginners. Immerse yourself in the world of drawing and draw a cupcake step by step.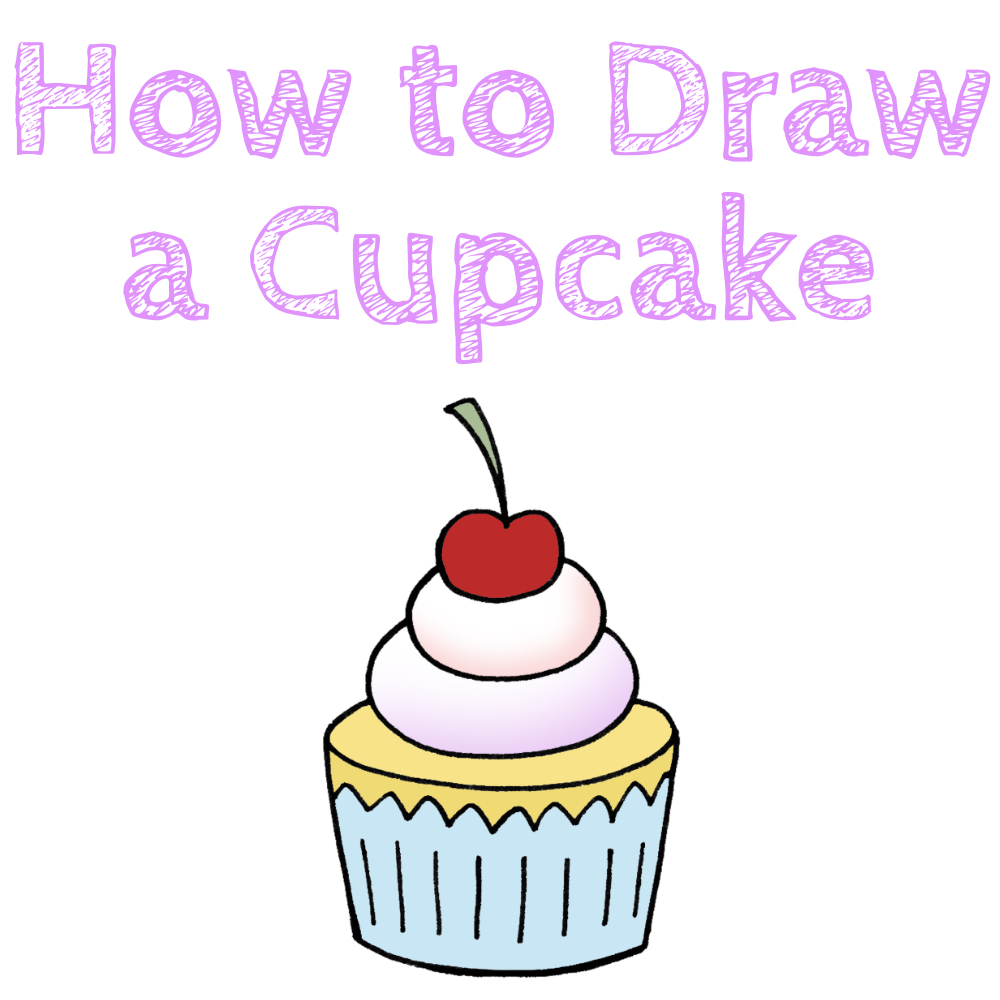
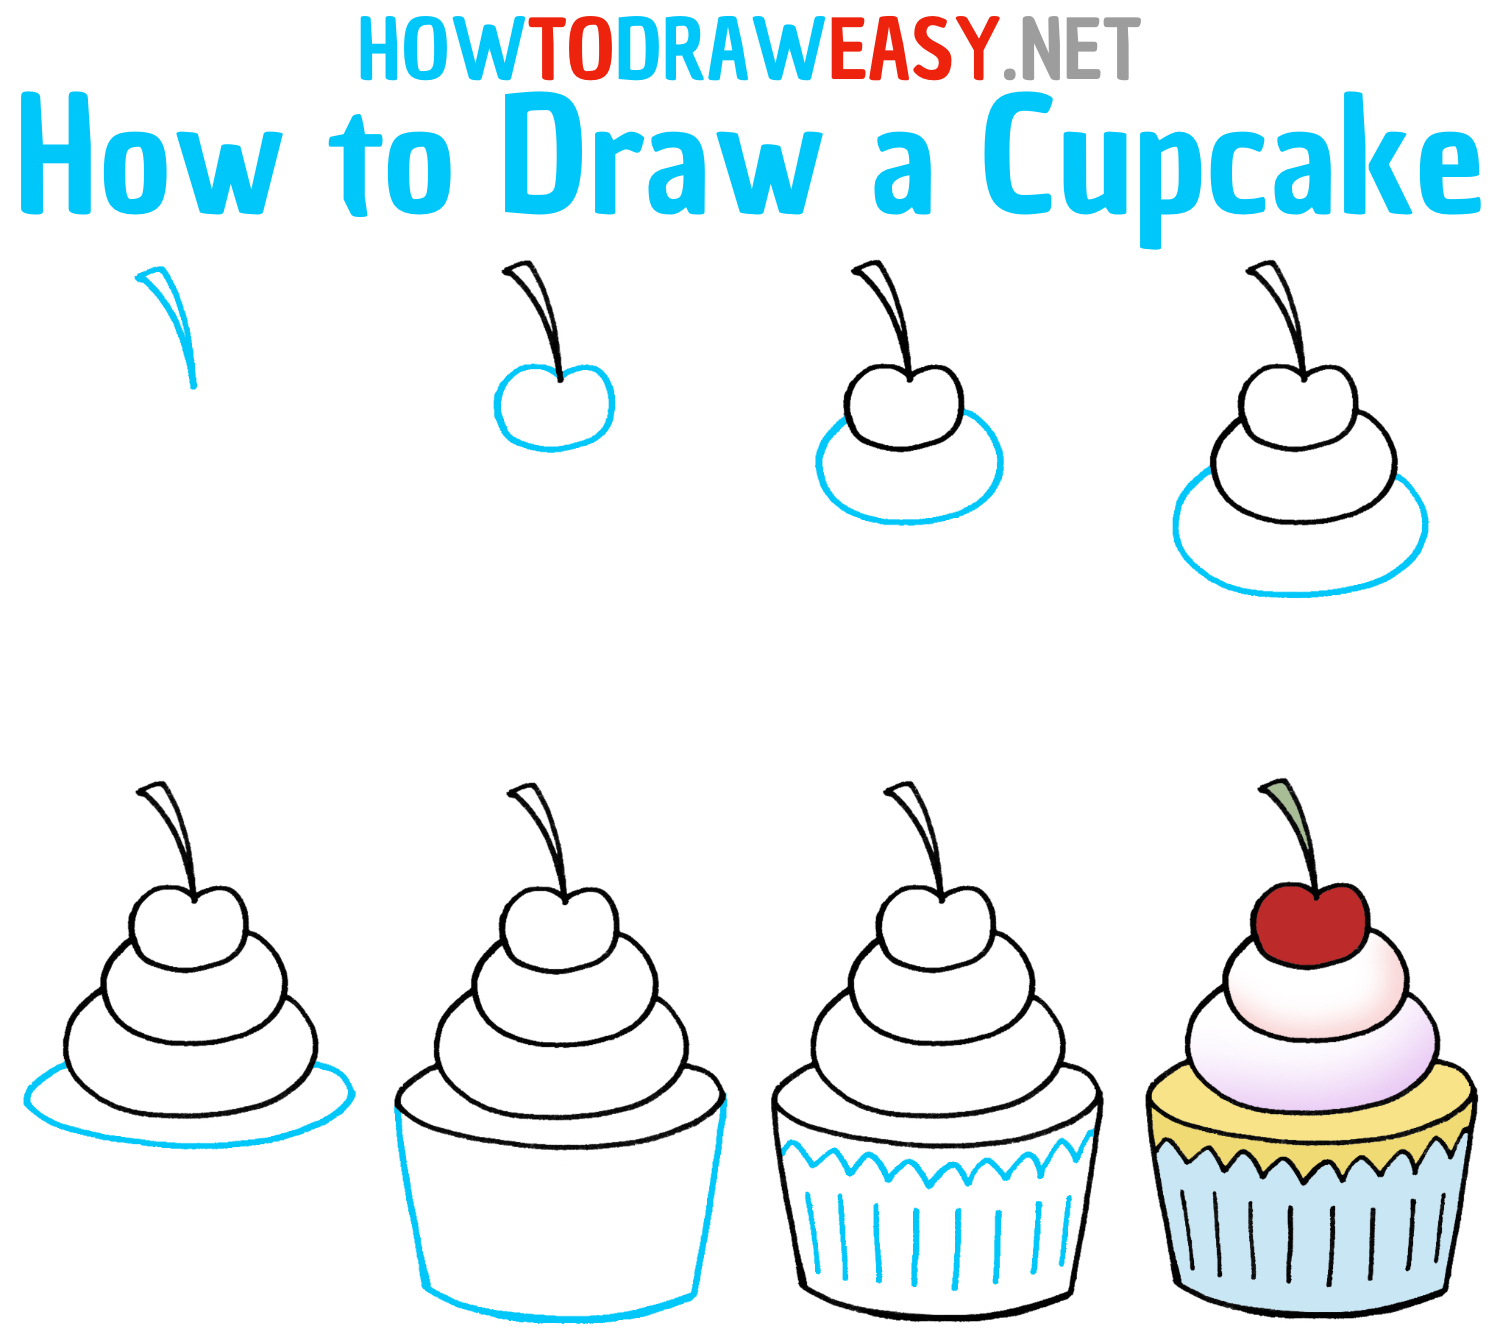
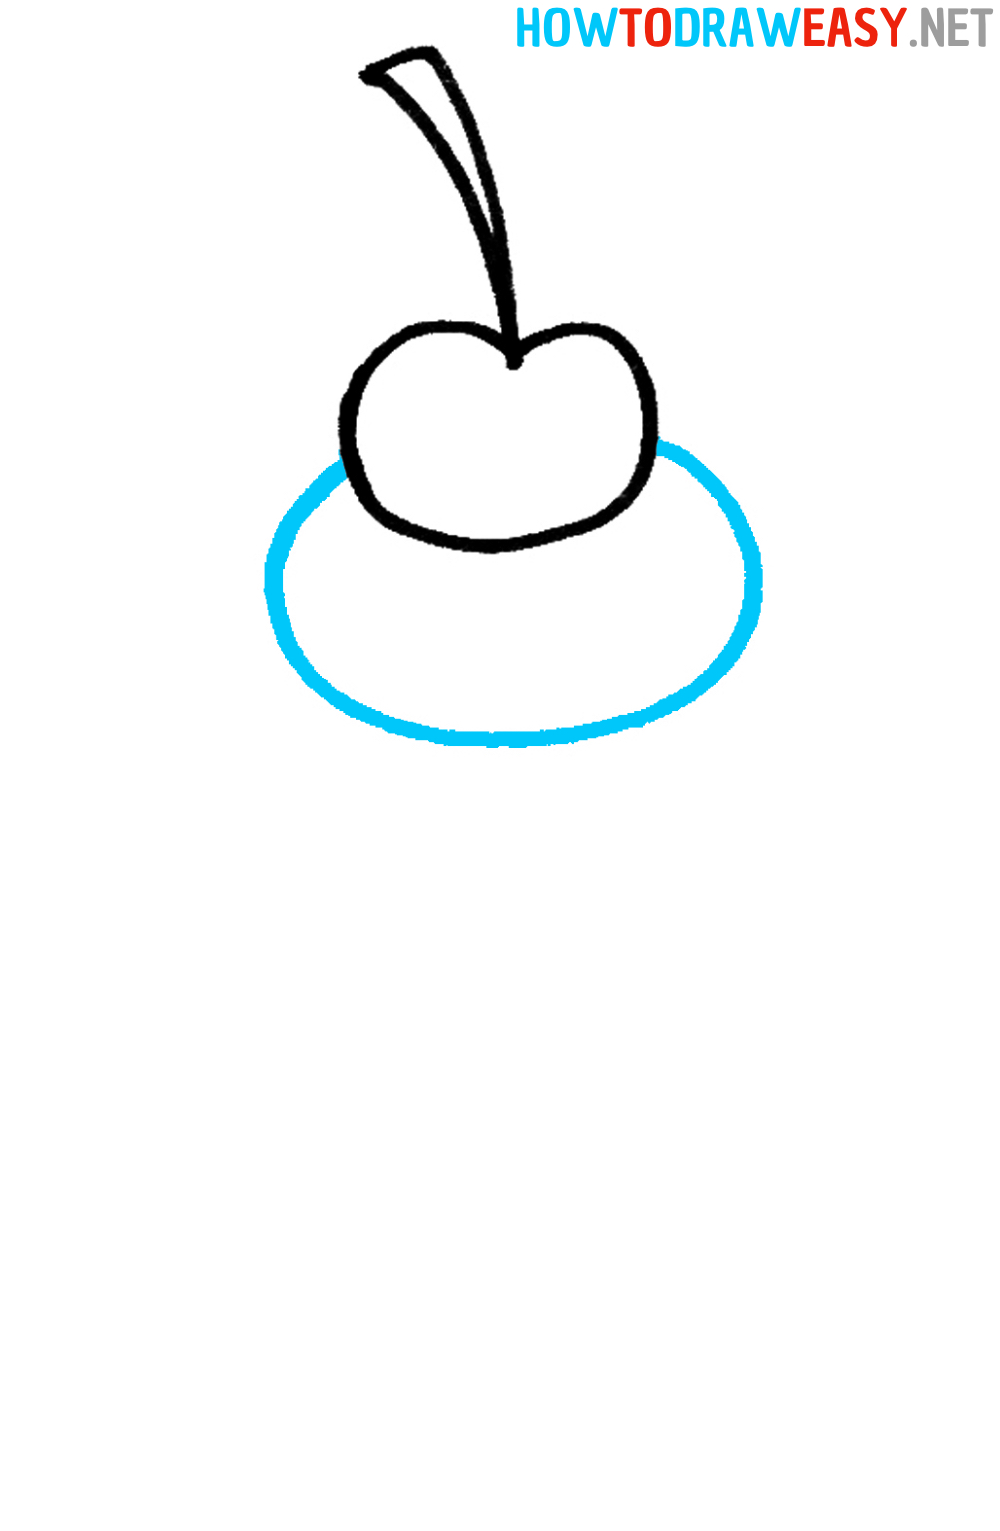
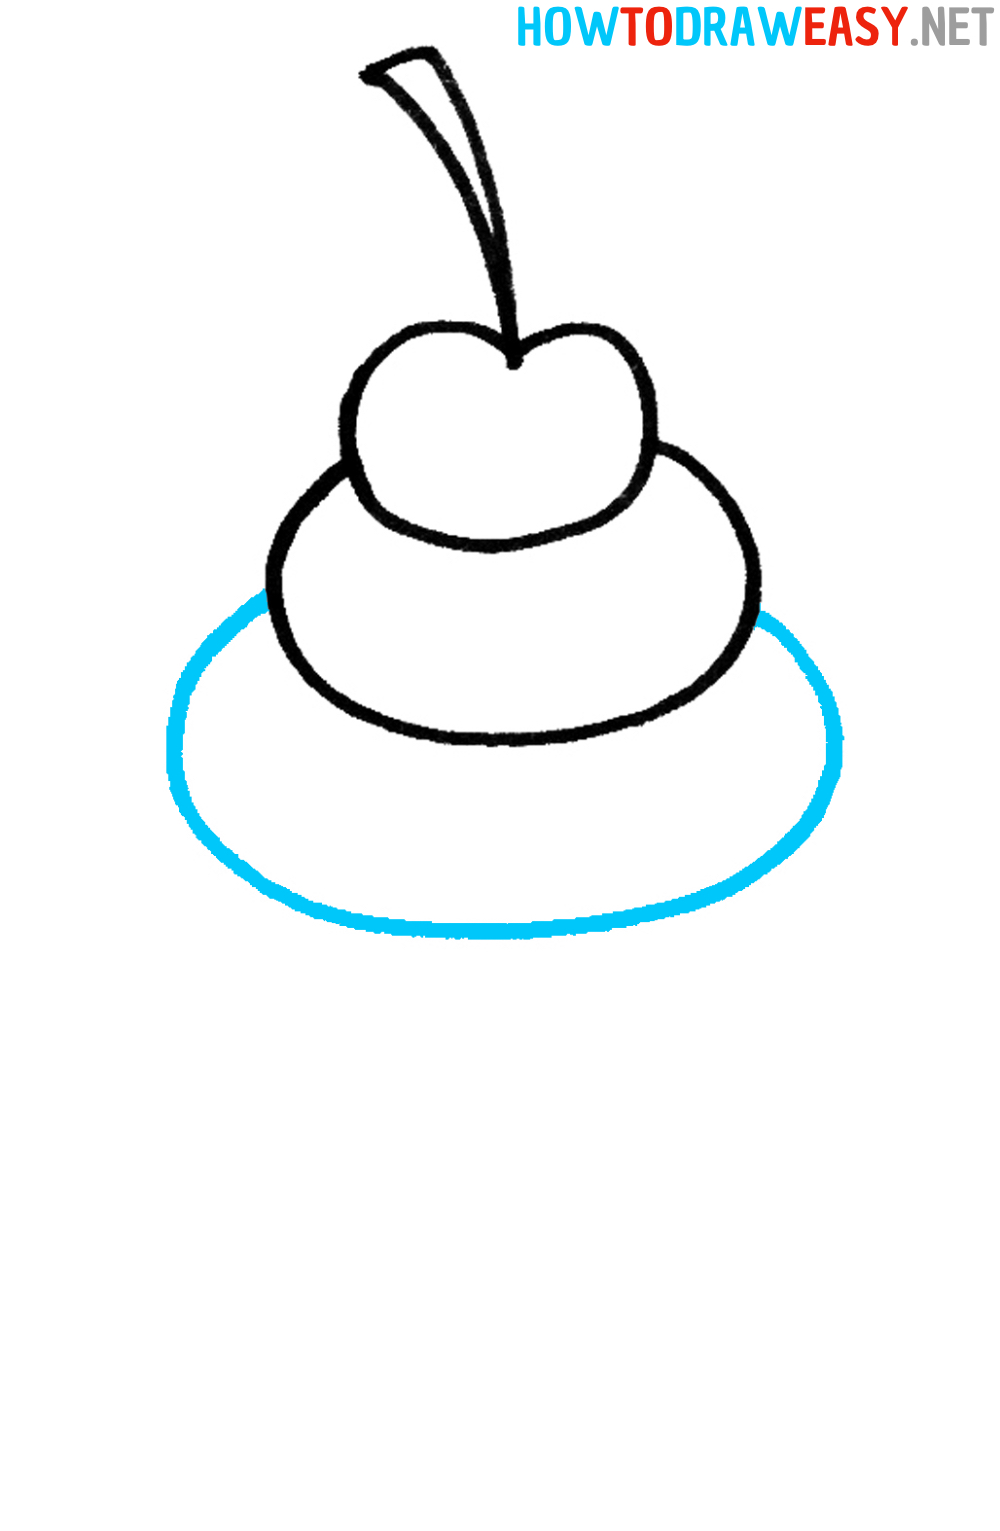
Hello friends! Today we will be drawing a cupcake. A cupcake is a small cake that is often decorated with frosting and other sweets. They are very popular at children’s parties and events. In this step-by-step drawing tutorial, you will learn how to easily draw a cupcake. Now let’s talk about what a cupcake looks like in real life. A cupcake usually has a round shape and consists of soft sponge cake that is covered with frosting. The frosting can be any color and texture, and the cupcake can have various decorations such as chocolate chips, berries, candies, and other sweets. Cupcakes can be decorated in different styles—from classic to unique designs — and they always look very appetizing! Time needed: 20 minutes How to Draw a Cupcake Step by Step
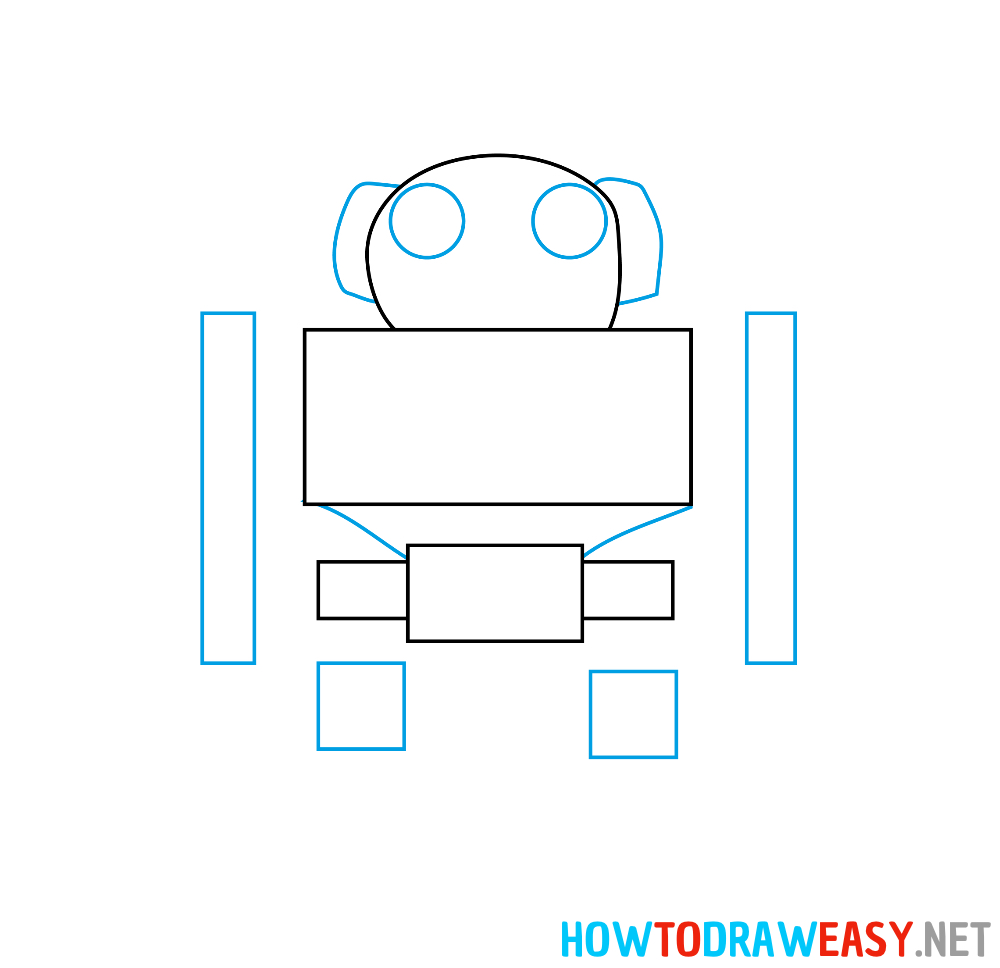
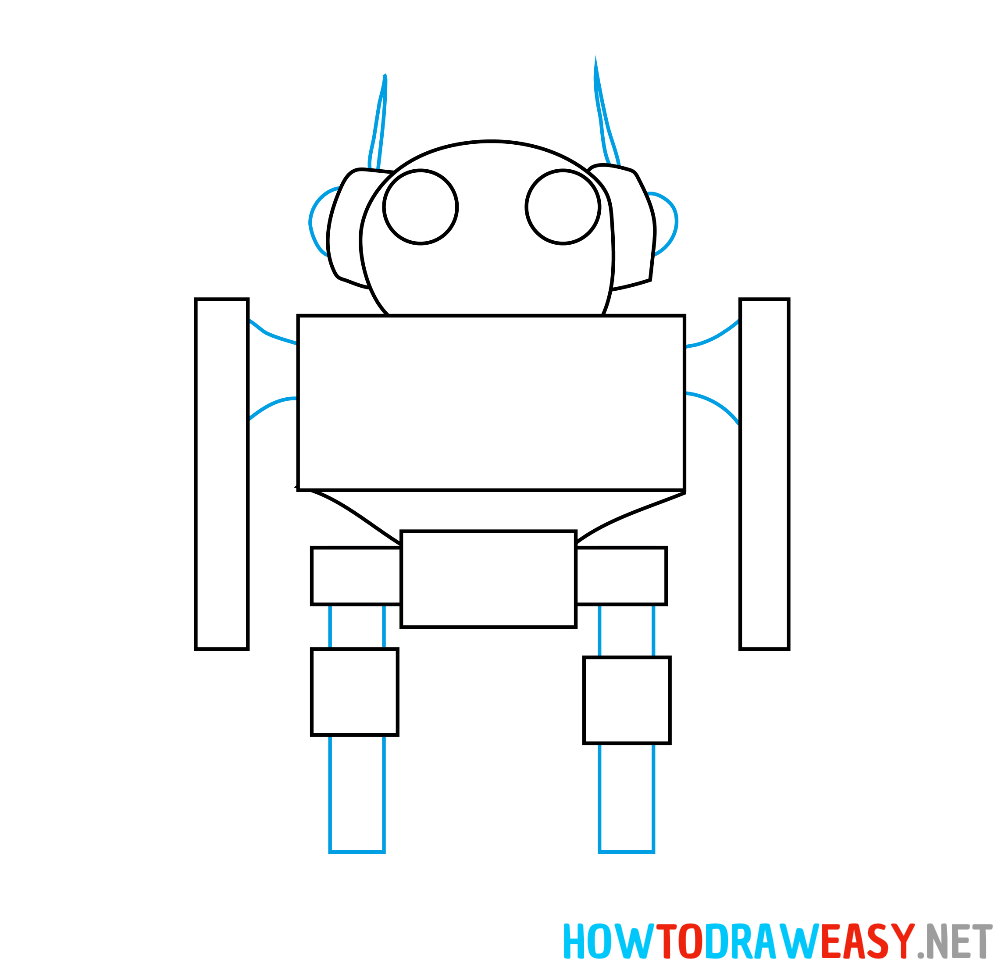
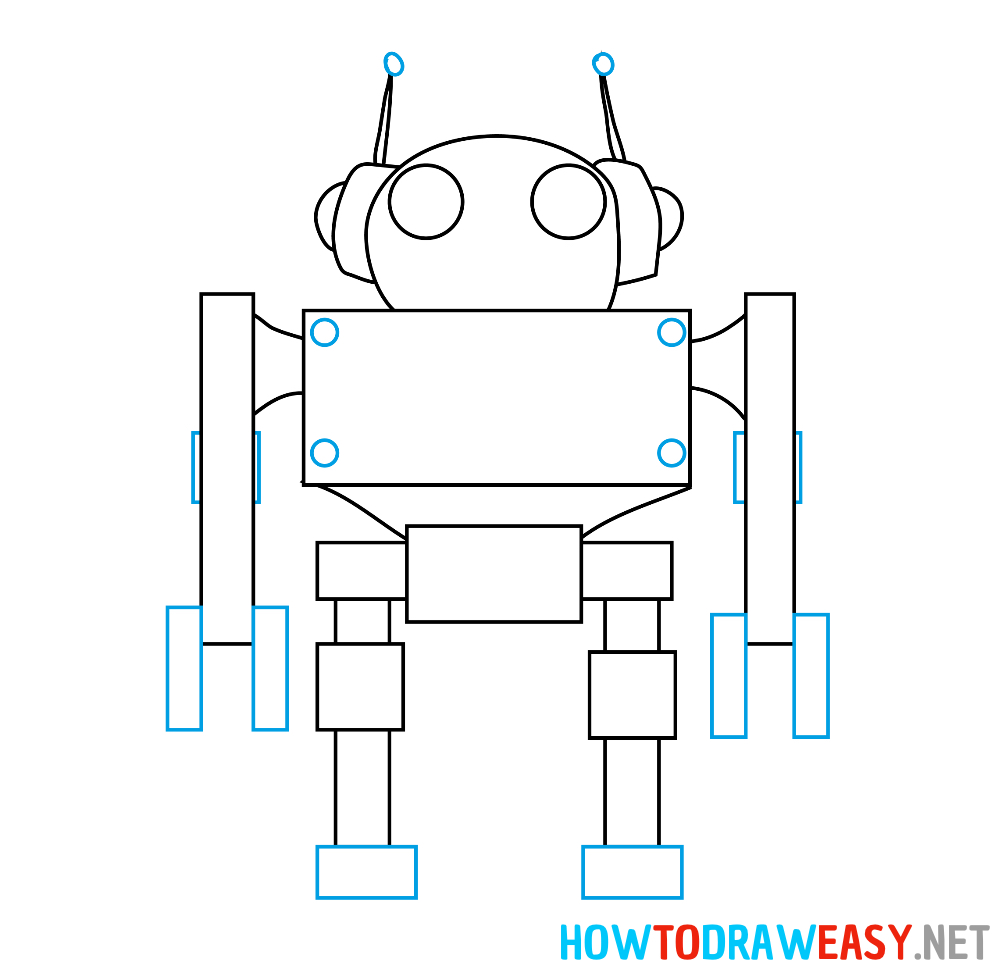
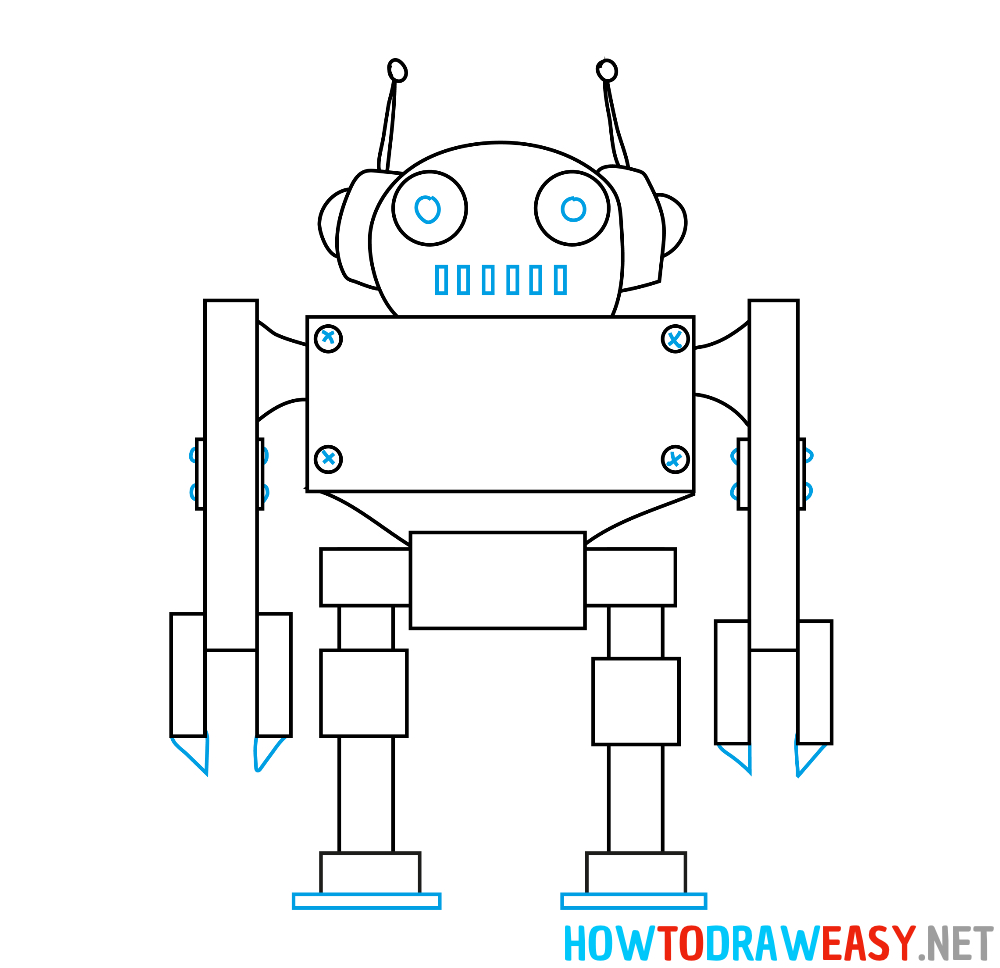
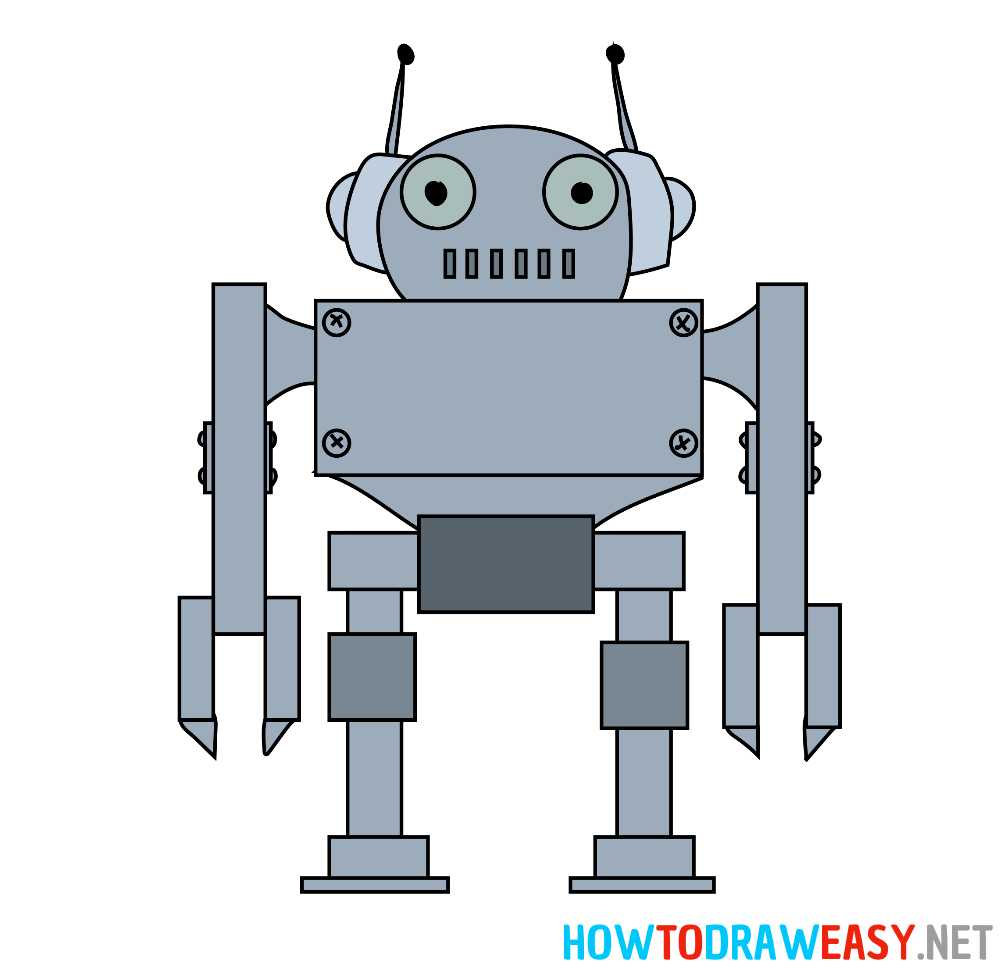
Congratulations! Now you have a beautiful cupcake drawing that you can use to decorate your albums or crafts. Don’t forget that drawing is a skill that can be improved and developed, so don’t be afraid to experiment and practice. We hope this lesson was helpful and inspiring for you. If you want to continue your creative development, we invite you to other drawing lessons on our website. There you will find many interesting tasks and tips for beginner artists. Good luck in your creativity! The post How to Draw a Cupcake appeared first on How to Draw Easy. Have you always dreamed of learning to draw a cartoon robot? In this step-by-step drawing tutorial, you will be able to learn how to draw a robot easily, step by step.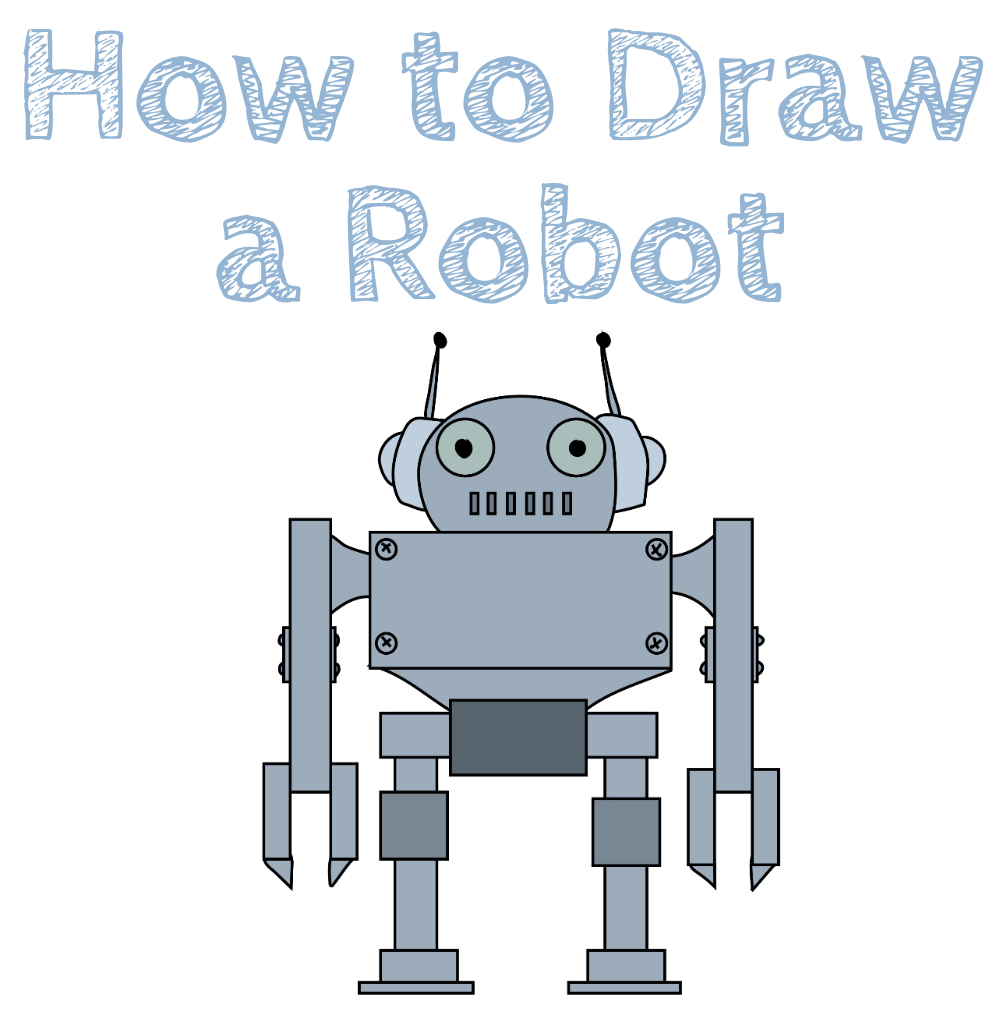
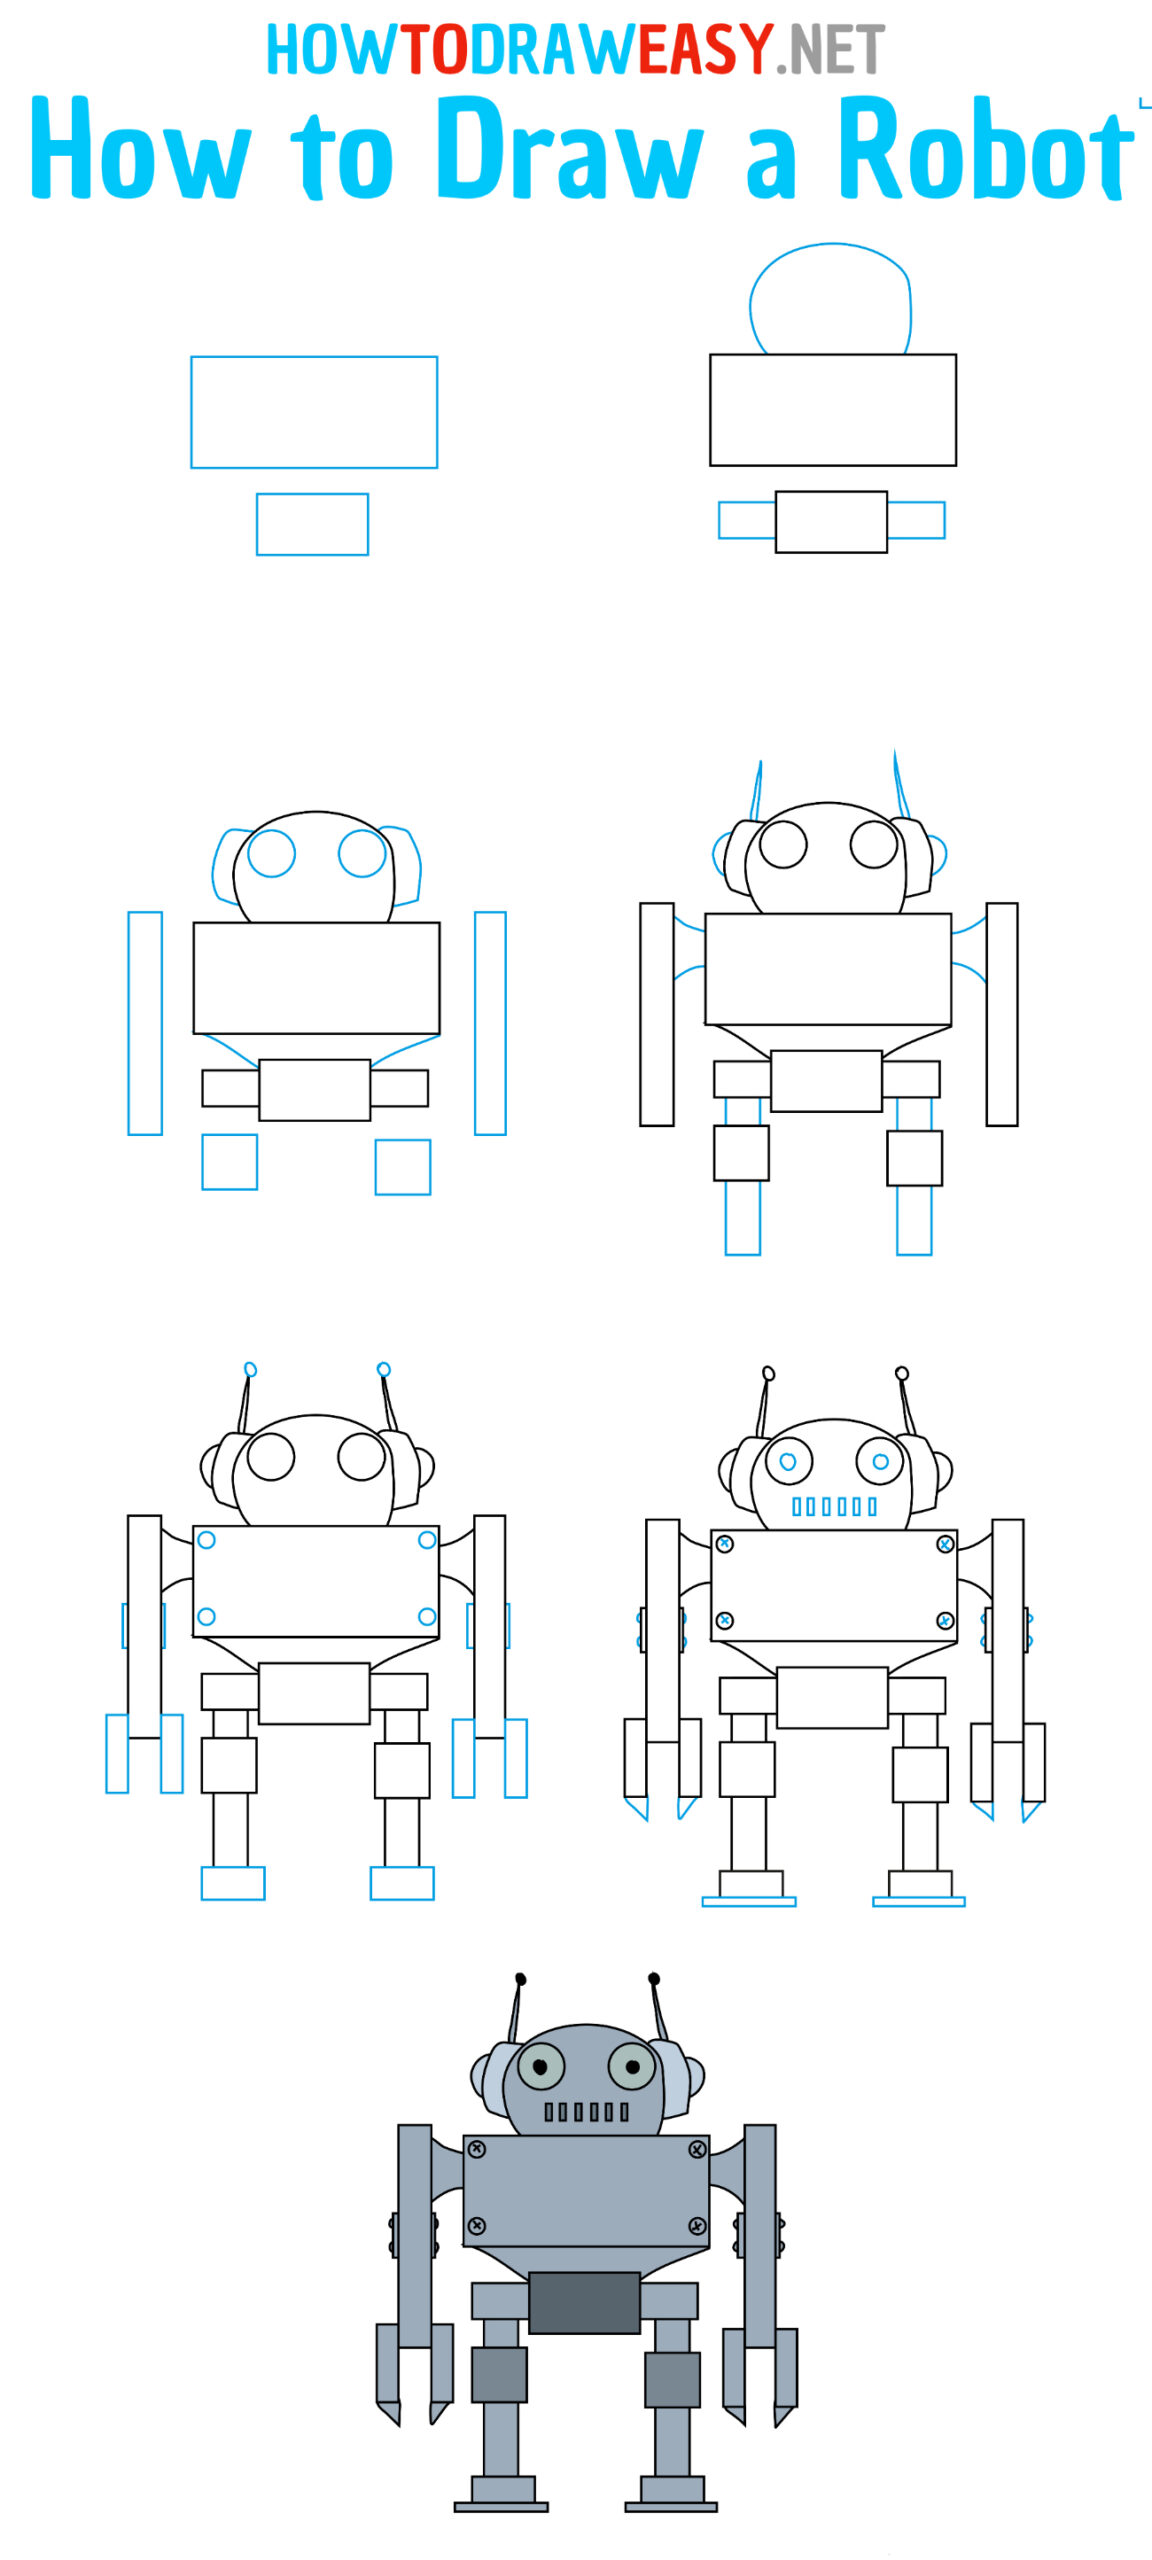
In a world where technology is developing at an incredible speed, robots are becoming increasingly popular. Their diversity is amazing: from high-tech machines that can perform any task to cute and friendly robots that can become real friends. In this easy drawing lesson, you will learn how to draw a robot step by step. One such robot looks cartoonish. Its round shape and bright colors remind us of characters from favorite cartoons. But despite its cute appearance, this robot has impressive strength and can perform the most complex tasks. Its eyes shine brightly, and its arms and legs bend in the right direction. It can move quickly and agilely, and its sensitive sensors allow it to feel the environment and react to changes in it. This robot can be an excellent assistant in many areas: from household tasks to complex scientific research. But the most important thing is that it will always be a loyal friend and helper to its owner. Drawing such a robot can be an interesting and exciting activity. You can use bright colors and fantasize about its appearance. Who knows, maybe your robot will become a real star! Enjoy drawing! Time needed: 25 minutes How to Draw a Robot Step by Step
In this lesson, we learned how to draw a cartoon robot. We started with basic shapes and then added details such as eyes, antennas, arms, and legs. Then we refined the robot’s face and finished the drawing by outlining it with a marker and coloring it in. I hope you enjoyed this lesson, and now you can draw your own cartoon robot! The post How to Draw a Robot Step by Step appeared first on How to Draw Easy. Learn here how to draw the Flash logo step by step. This is a very easy and understandable drawing lesson, even for beginners and kids.Flash is one of the most popular and beloved superheroes in the DC Comics universe. His real name is Barry Allen, a forensic scientist who gained super-speed after an accident in which various chemicals and a lightning bolt combined. Acquiring new abilities, Flash becomes the protector of Central City, battling crime and various supervillains, and also being a key member of the Justice League, a team of mighty Earth heroes. In this step-by-step drawing lesson, you will learn how to draw the Flash logo easily. Flash possesses incredible speed, allowing him to run, think, and react at superhuman velocities. This not only allows him to move at speeds faster than light but also grants him the ability to vibrate through solid objects, time travel, and even create cyclones with the sheer force of his speed. His red costume, adorned with lightning, has become iconic, symbolizing his swiftness and agility. The Flash’s logo features a stylized lightning symbol in the center of a circular background, typically in yellow and white. It symbolizes the superhero’s lightning-fast abilities and has become a recognizable symbol in the world of comic book superheroes. Starting with basic shapes and then refining the details, learners can create their own interpretation of the famous Flash symbol, embracing both creativity and the spirit of this legendary superhero. Enjoy your drawing! Time needed: 25 minutes
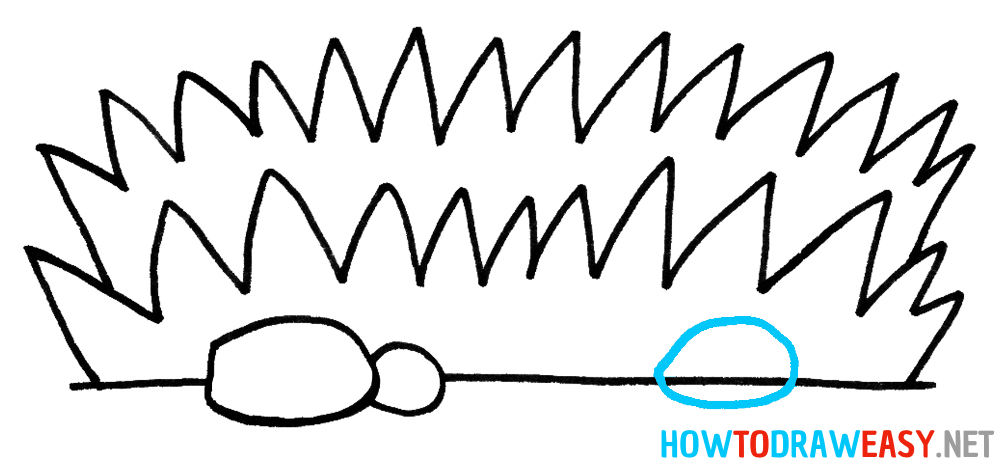
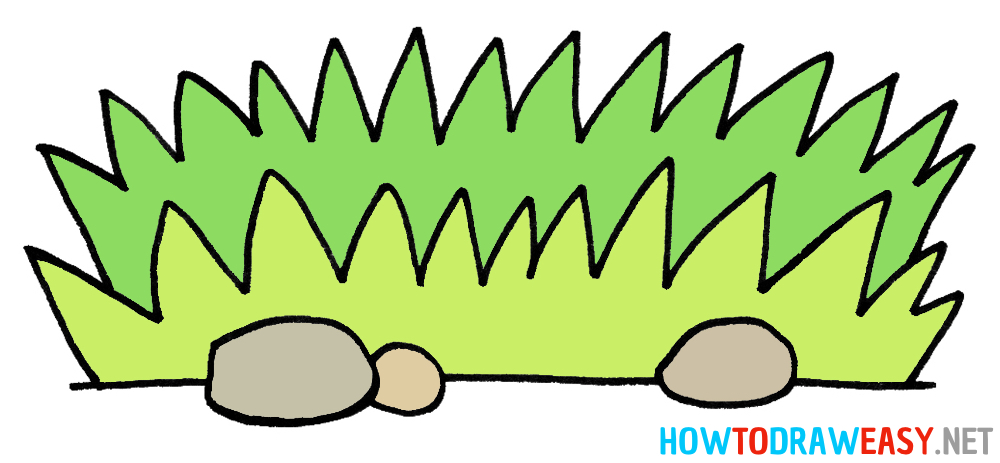
Mastering the art of drawing the Flash logo allows us not only to recreate the symbol of strength and speed of this character but also gives us the opportunity to embody the spirit of this legendary superhero on paper. As we conclude this drawing lesson, let’s remember the values that the Flash represents—determination, heroism, and the unwavering pursuit of justice. Embrace the creativity and energy of this legendary superhero as you bring the Flash logo to life on paper. May the inspiration live within you, and may you continue to explore the world of comics and art. The post How to Draw the Flash Logo appeared first on How to Draw Easy. We hope that this drawing lesson will help you create a wonderful piece of art depicting grass on paper. Learn how to draw grass easily with us!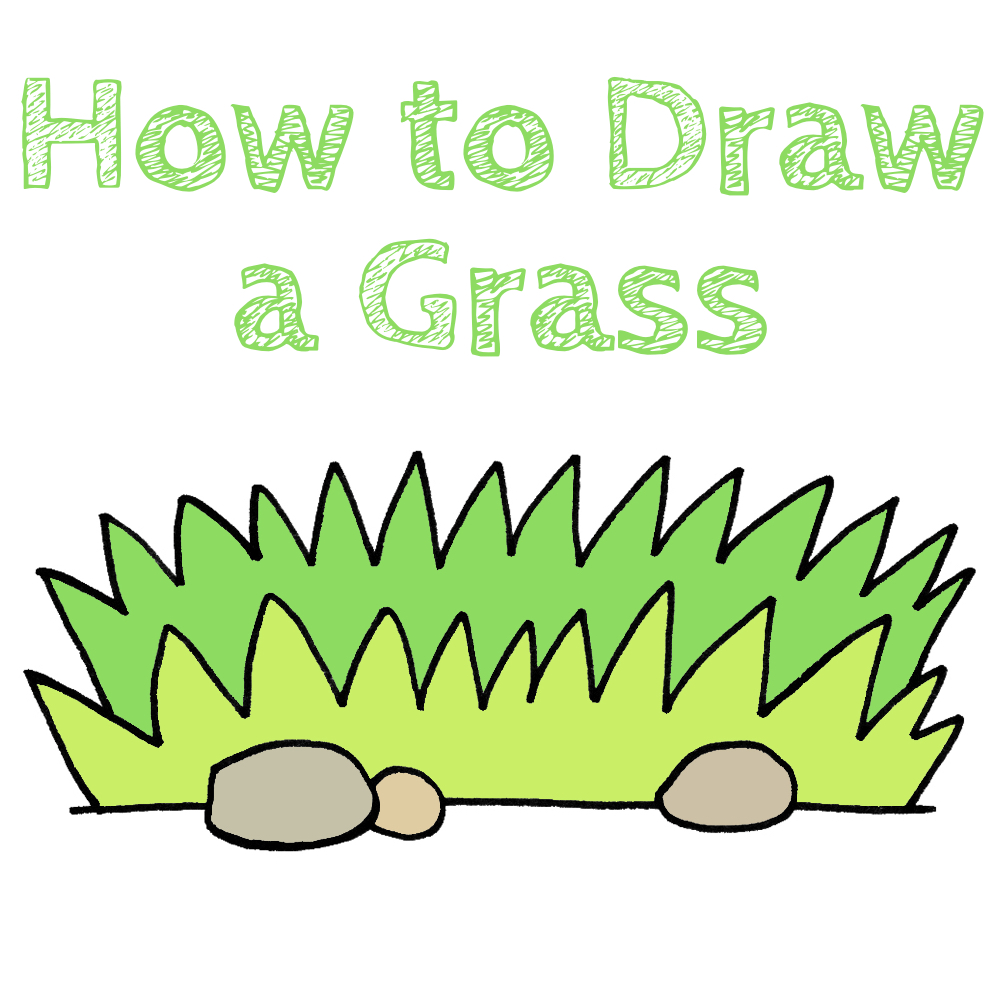
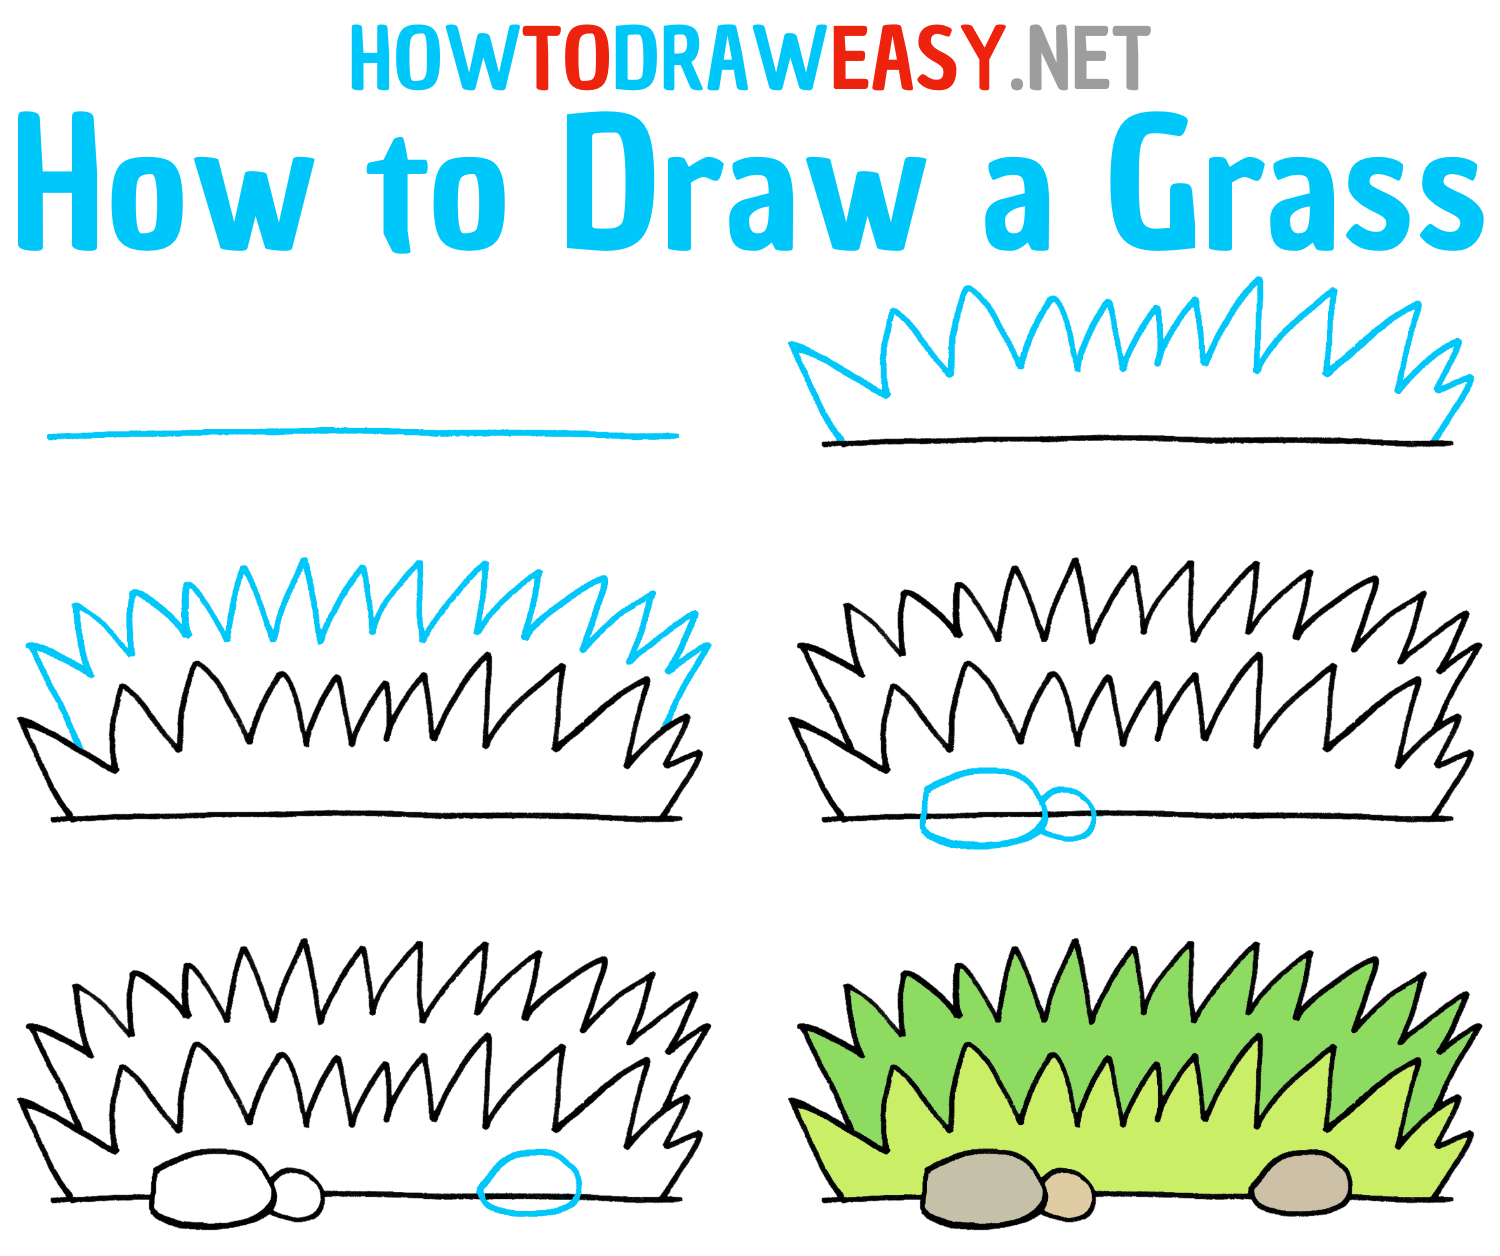
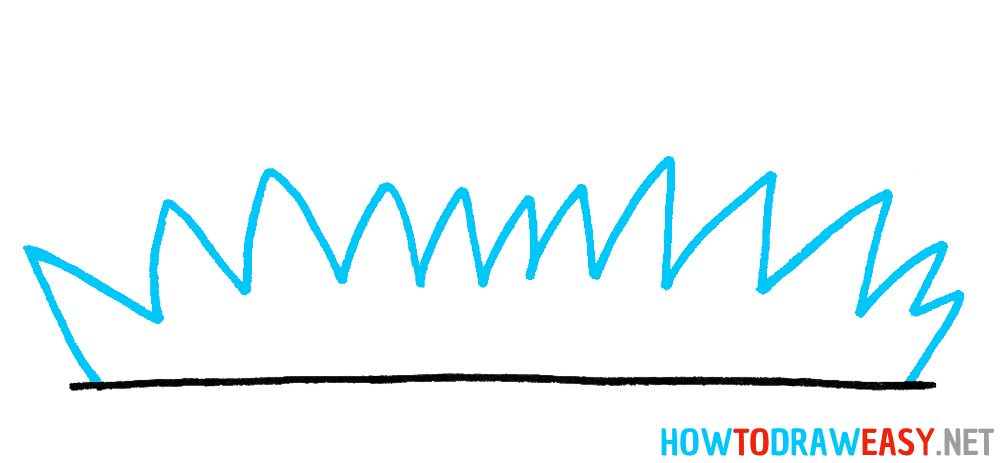
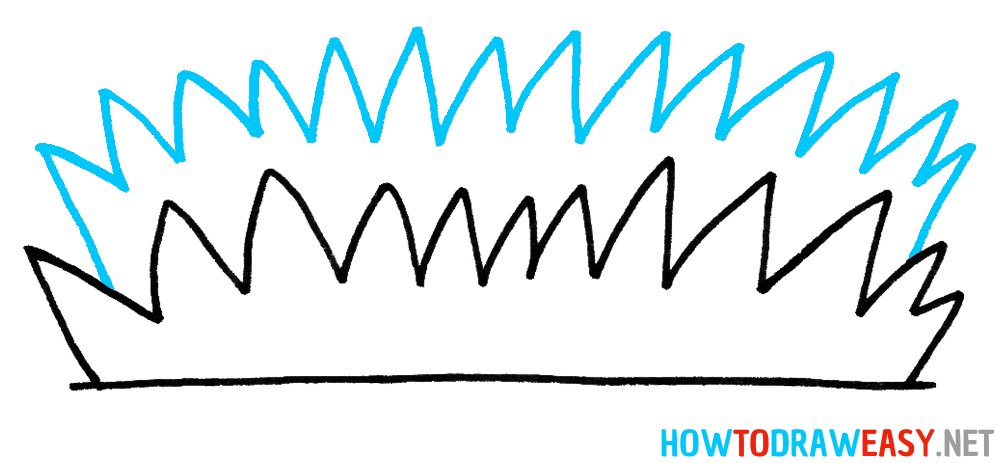
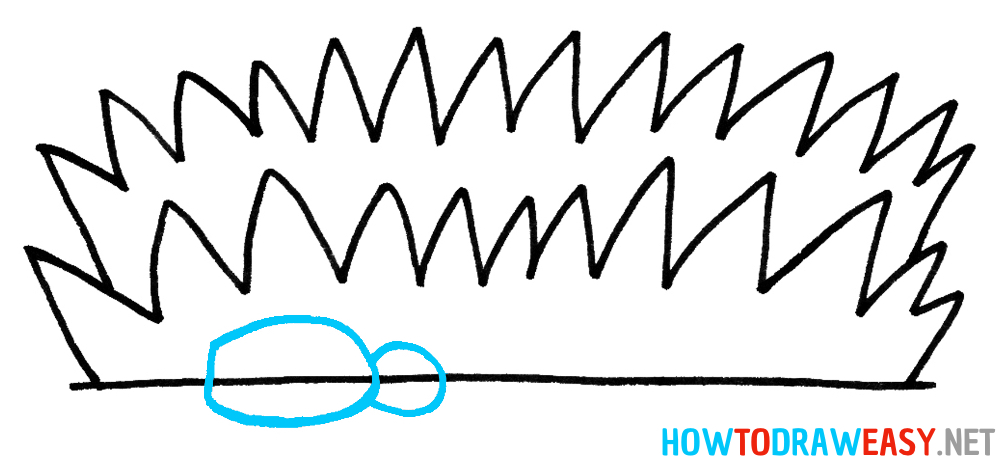
Glad to have you in this easy tutorial on drawing grass! Here, you will learn how to draw grass step by step. We will dive into the captivating world of natural vegetation to explore the amazing beauty of grass. Grass is not just a green plant; it plays a crucial role in the biological processes of our planet, enriching it with its unique properties. From a biological perspective, a lawn is a variety of plants that include grasses, mosses, and other ground cover. It serves not only as an ornament in a garden or park but also performs essential functions in the ecosystem. Grass forms a dense carpet, holding the soil, preventing erosion, and providing nutrient-rich soil for many other plants. It also serves as a shelter for various animals and insects. Our lesson today will help you capture the beauty and natural characteristics of grass through artistic representation. Shades of green, textures, and shapes—these will all be important in creating an engaging and vivid depiction of grass on paper. I am confident that this lesson will bring new knowledge and inspiration to each of us! Enjoy the process of drawing! Time needed: 25 minutes How to Draw a Grass Step by Step
The post How to Draw a Grass appeared first on How to Draw Easy. Learn how to draw the Earth step by step using our simple instructions for beginners. Immerse yourself in the world of drawing with our lessons!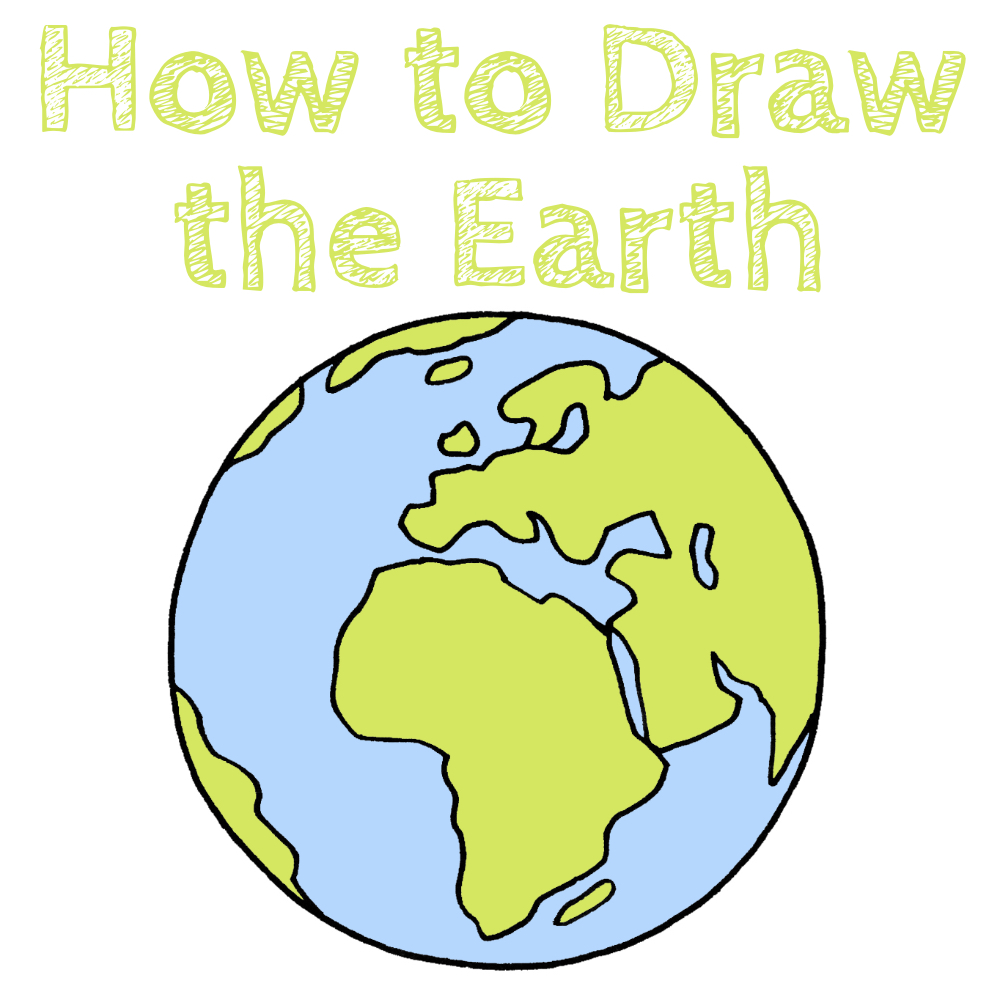
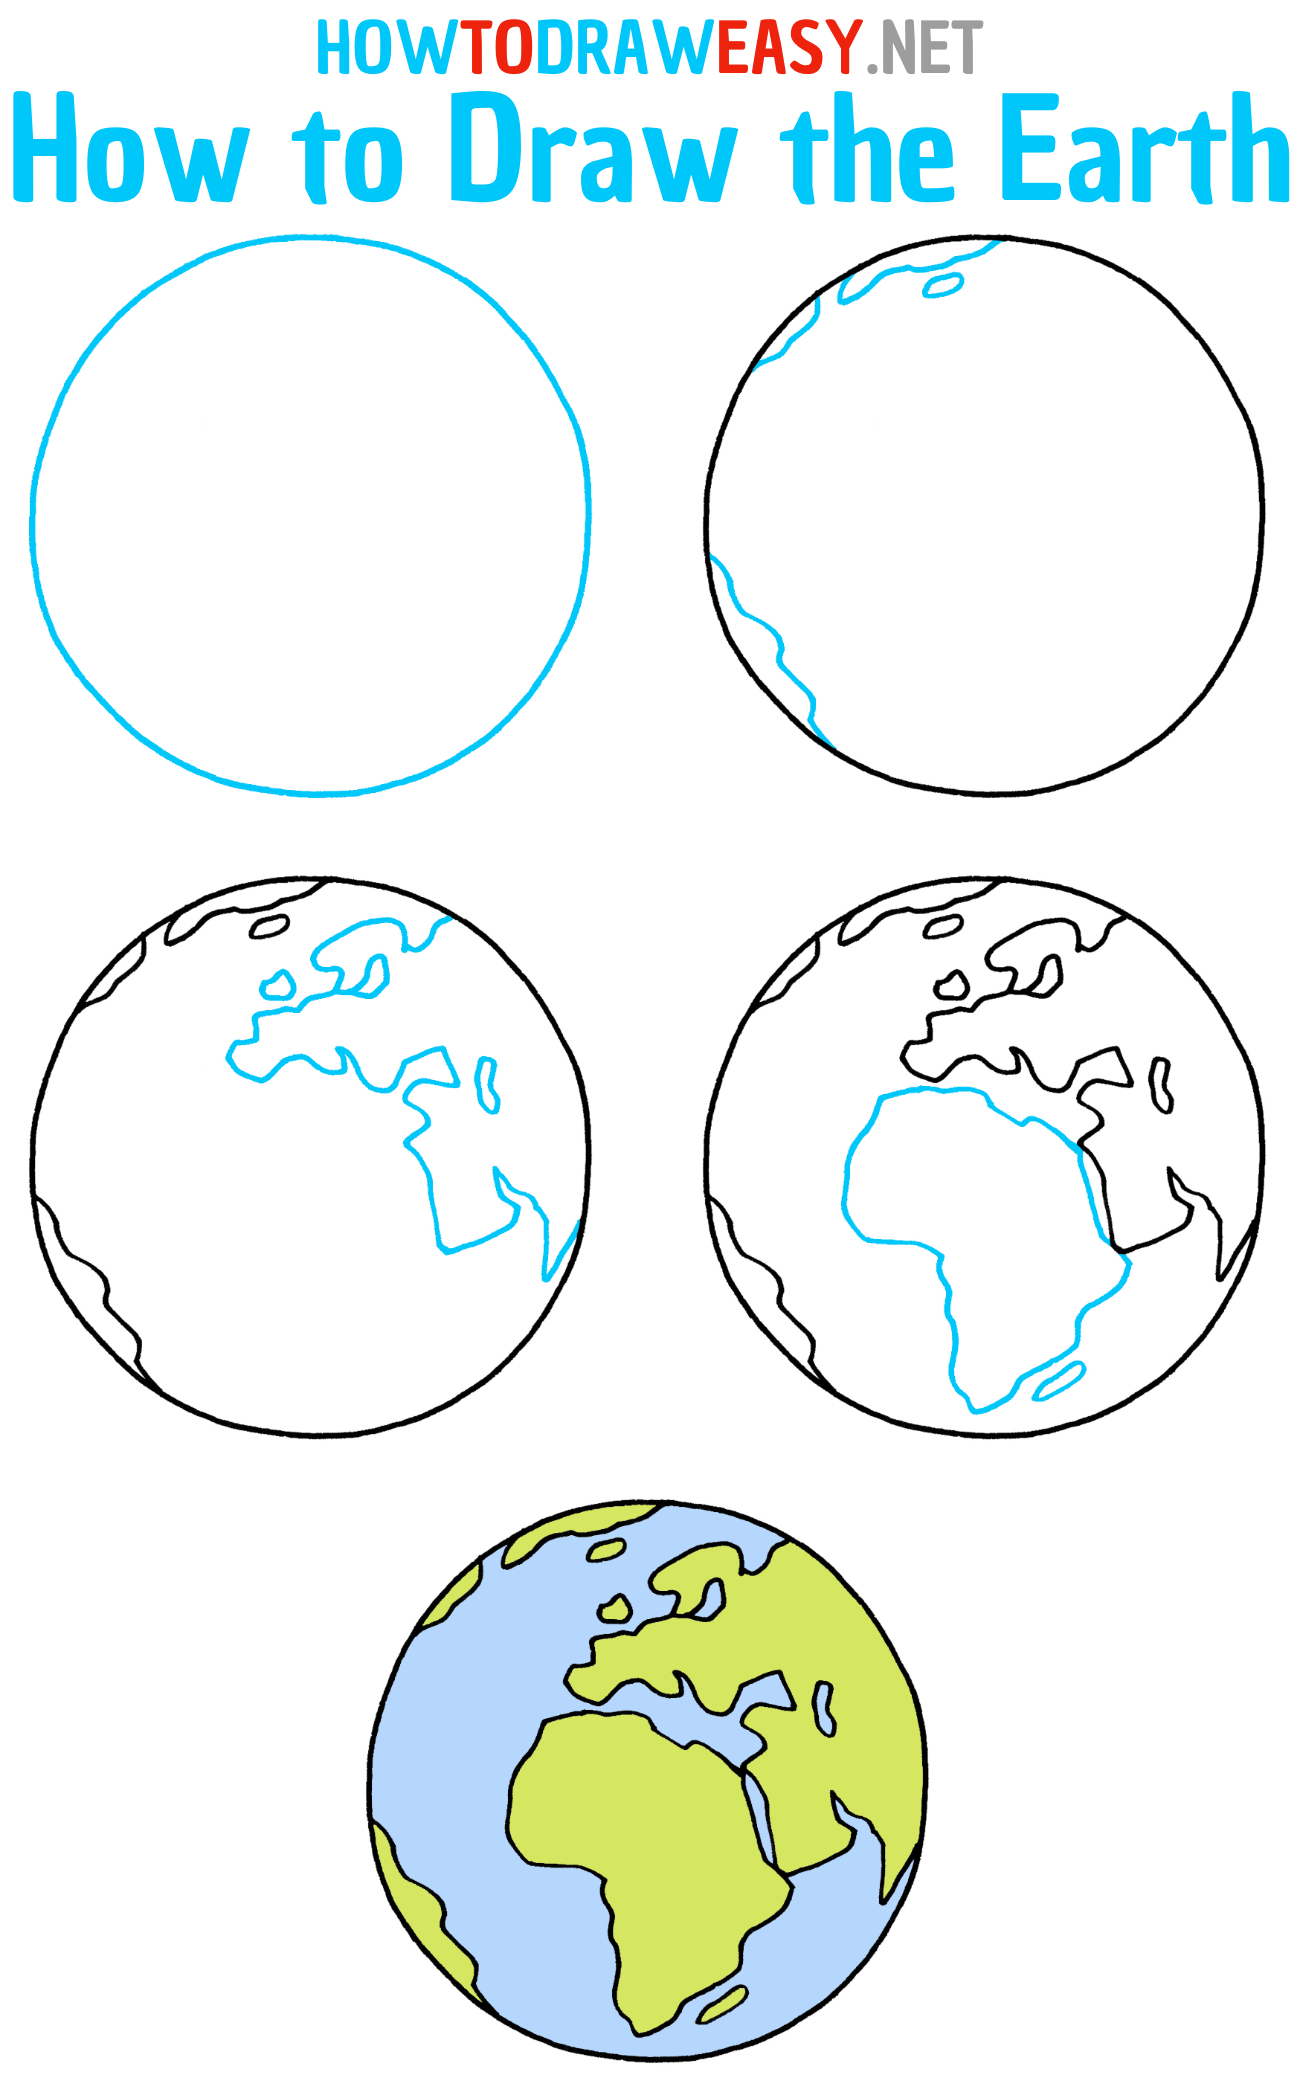
We are glad to welcome you to our easy step-by-step lesson where you will learn how to draw the Earth. Drawing the Earth can be a fun and rewarding experience. In this lesson, we will learn how to draw our planet using simple steps that are perfect for beginners. So, let’s dive into the world of drawing and explore the beauty of our planet together! The planet Earth is the third planet from the Sun in the Solar System. It is the only known planet to support life. Earth has a diameter of approximately 7,918 miles (12,742.79 km) and rotates on its axis every 24 hours, creating day and night. The surface of Earth features oceans, continents, mountains, rivers, and lakes. Earth’s atmosphere is primarily composed of nitrogen and oxygen, enabling life to thrive. Planet Earth is an incredible place that we must cherish and preserve for future generations! Materials Needed:
Time needed: 25 minutes How to Draw the Earth
We are glad that you were with us during the process of drawing the Earth. We hope that you have created a great drawing. Furthermore, we look forward to seeing you in other drawing lessons on our website! The post How to Draw the Earth appeared first on How to Draw Easy. Dive into the world of drawing with our drawing lessons for beginners. In this guide, you will learn how to draw a rainbow step by step.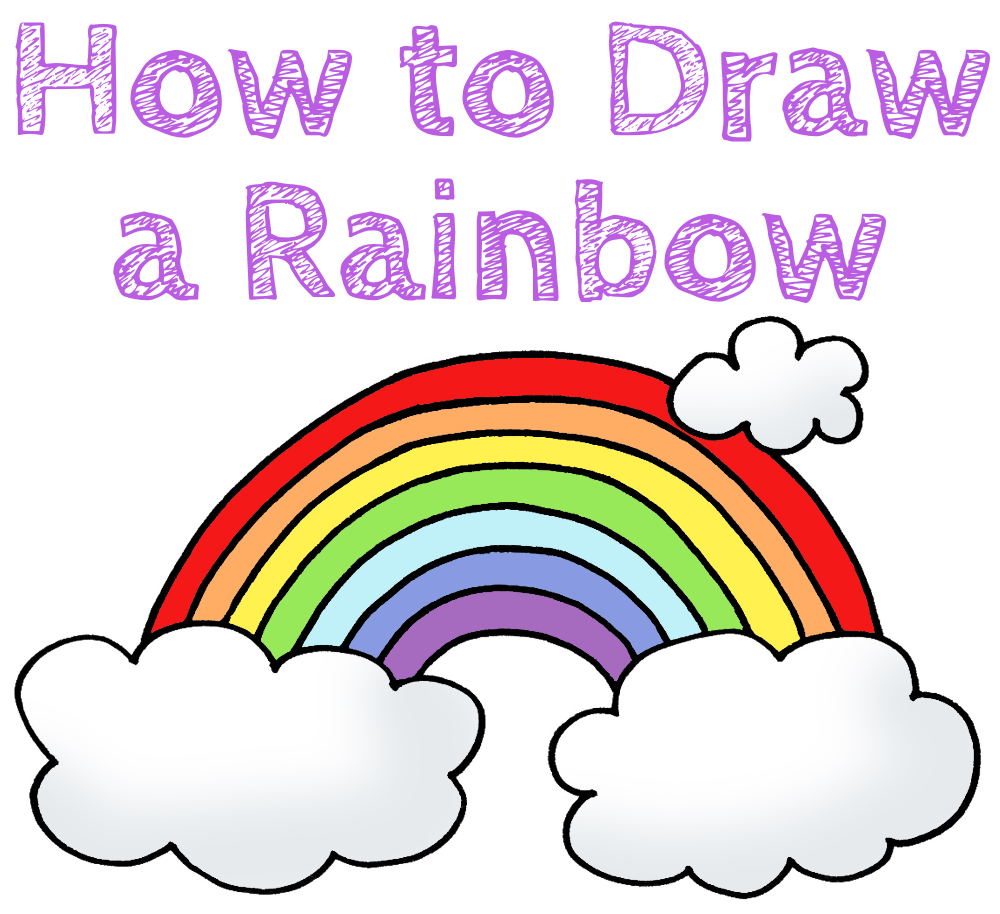

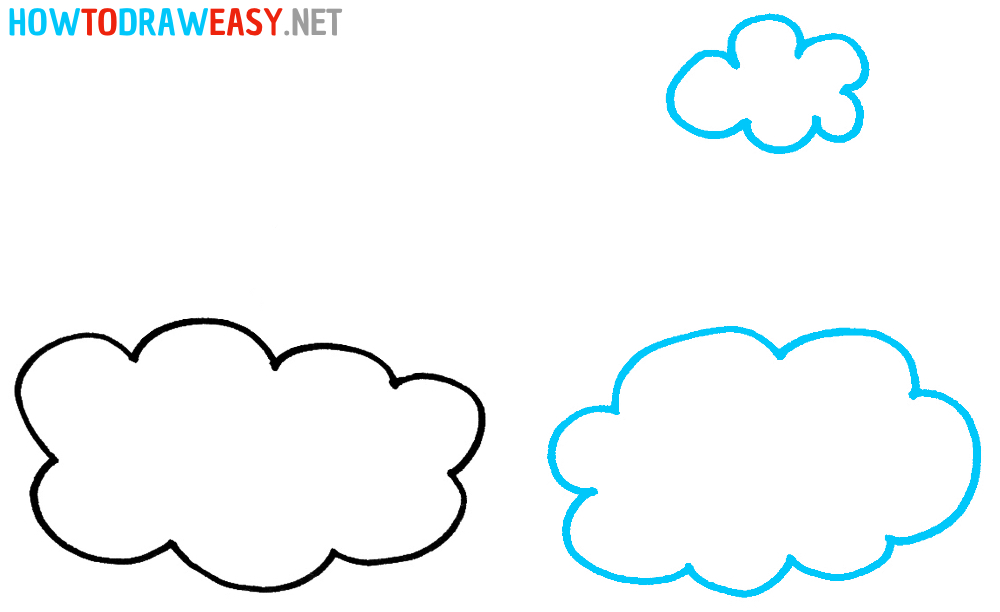
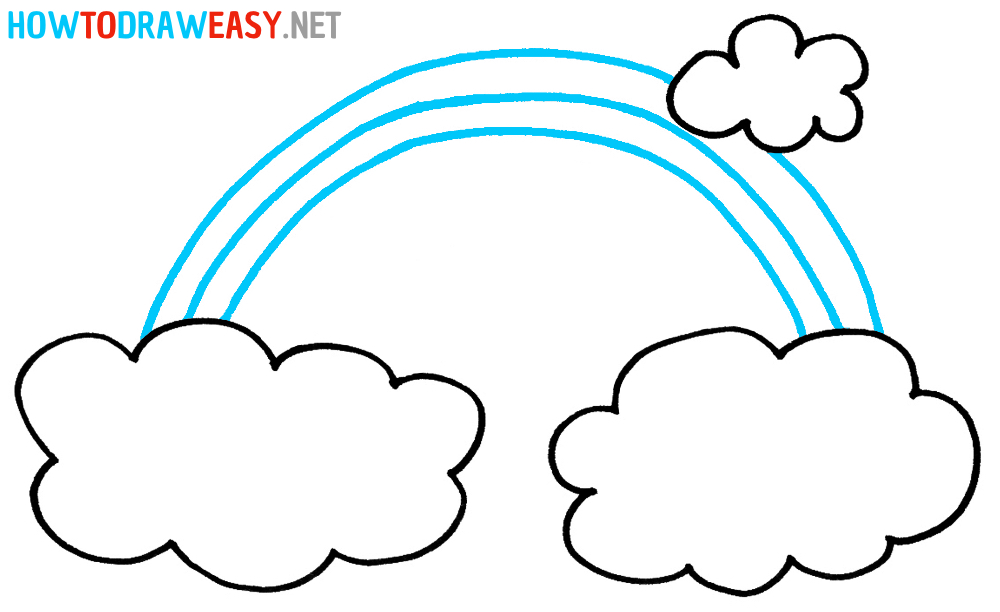
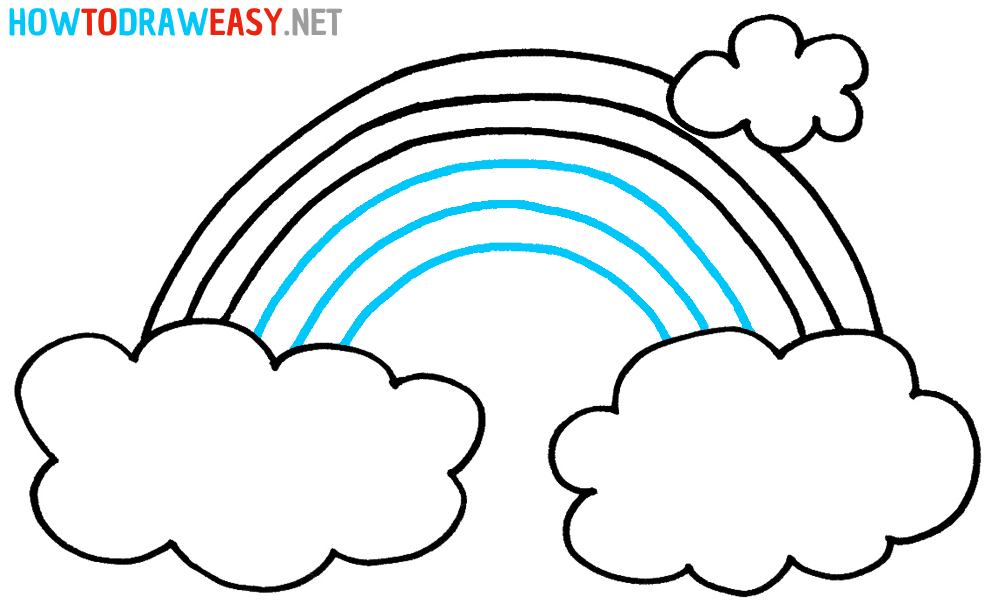
Welcome to the rainbow drawing lesson! A rainbow is a natural phenomenon that appears as a colorful arc in the sky after rain or a storm. It is created by the refraction of light in water droplets in the Earth’s atmosphere. Learn how to draw a rainbow easily step by step! A rainbow consists of seven primary colors: red, orange, yellow, green, blue, indigo, and violet. Each color has its unique shade and brightness. A rainbow can appear not only during rain but also in the presence of fog or a waterfall. Sometimes, you can see a double rainbow that forms when light reflects inside raindrops twice. A rainbow is not only a beautiful sight but also a symbol of hope and renewal. In different cultures, the rainbow has its symbolic meaning. For example, in ancient Greek mythology, the rainbow was a bridge between the world of gods and humans. You can draw this beautiful rainbow, even if you are drawing for the first time. Don’t forget to add details such as clouds or trees to make your rainbow look even more realistic. Drawing a rainbow is a wonderful way to express your creative nature and enjoy the beauty of nature! Time needed: 20 minutes How to Draw a Rainbow Step by Step
Drawing a rainbow can be a fun and creative activity for kids and adults. By following the simple steps outlined in this lesson, you will be able to easily create your own colorful rainbow drawing. Thank you for joining us and drawing the rainbow with us! The post How to Draw a Rainbow appeared first on How to Draw Easy. |